DIY marbled clay jewelry dishes
When I first saw this DIY on Pinterest, I loved it, but I also sighed in disappointment at how involved and difficult it looked. Isn't that always how DIY projects go? One night at midnight you pin 13 projects that you're all jazzed up about, only to wake up the next day and wonder what came over you that you thought you'd actually pursue these crafts. That's a little how I felt with this one, inspired by A Beautiful Mess, but as it turns out, for no reason! This is not nearly as involved as it looks, and the materials were also inexpensive. Plus, the final product is stinkin' cute! Worth it.
There is a lot of room for "error" in the sense that regardless of how meticulous you are, no two dishes are going to look identical—each will have a unique look, so it's fun to play around with different combinations of colors and amounts of each color. And I love that the possibilities of colors are endless.
Here are some of my tips I learned after doing this DIY project
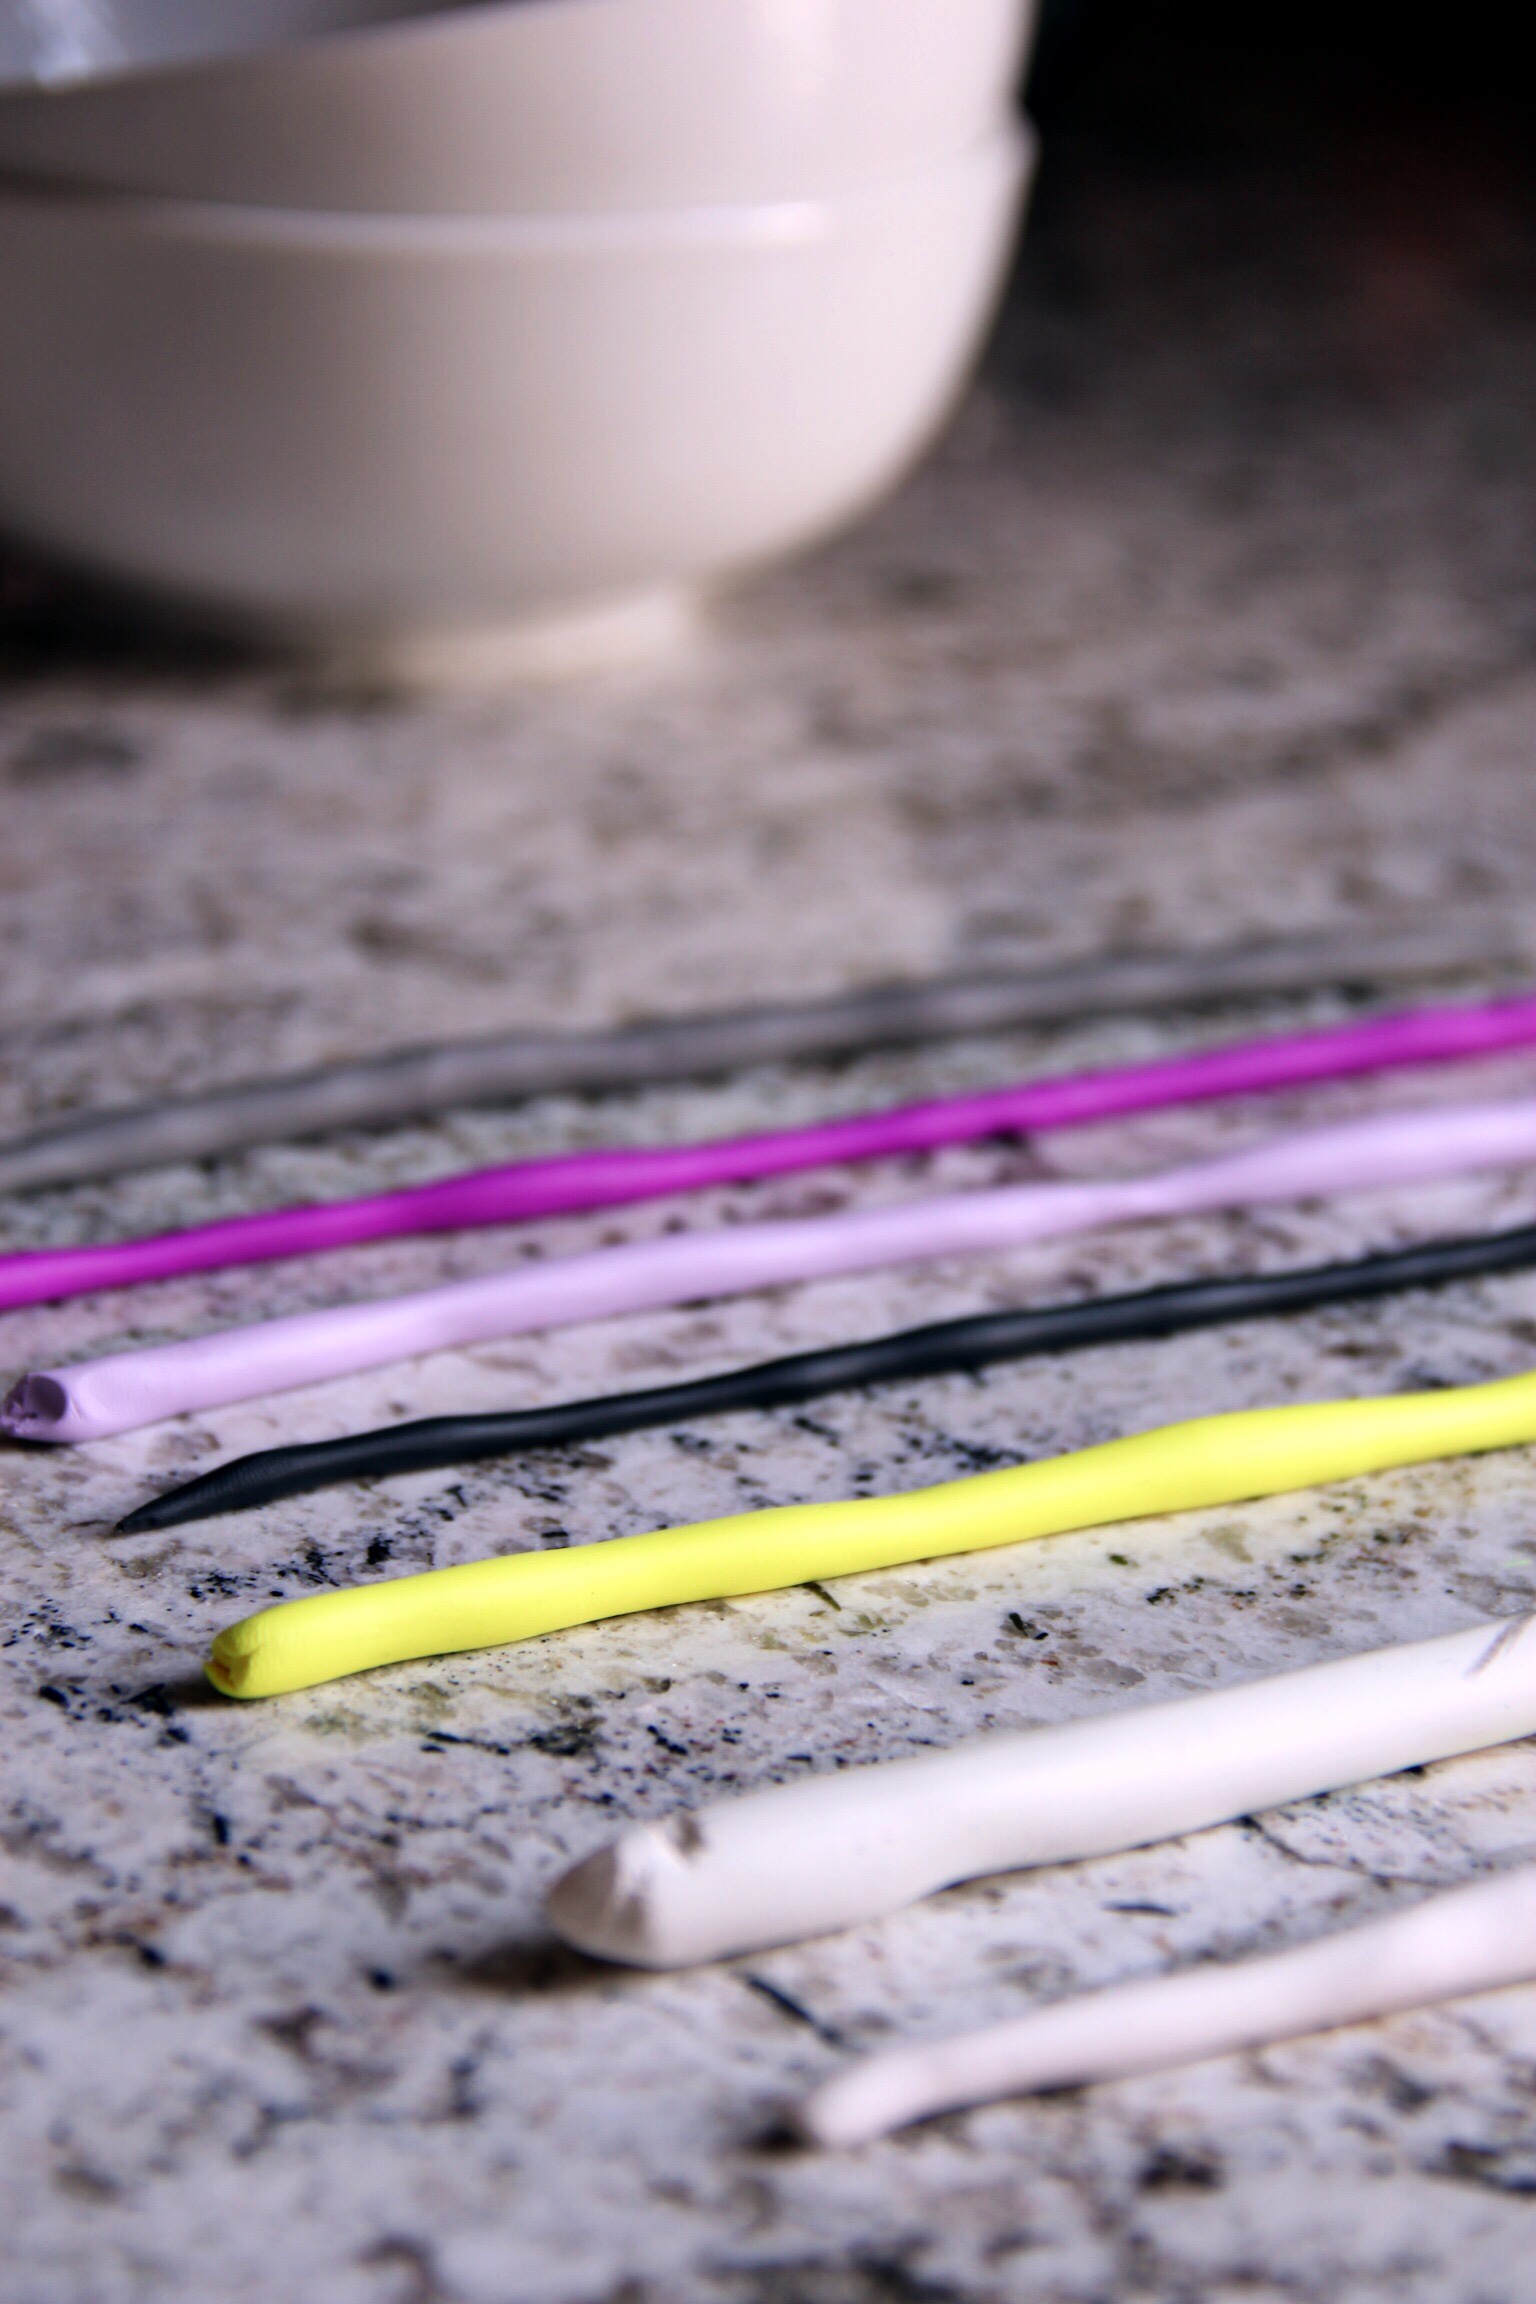
- You need to use a lot more white clay than colored clay to get the white-base marbled look that you see in my dishes (the more white you use, the more white you'll end up with).
- My best advice for what amounts to use of each color is to make two thicker 6-inch long snakes of white, and then about four thinner snakes of colors, varying them according to which colors you want to see the most of. You need about 2-2.5 oz of clay total to make dishes like mine, about 4 inches in diameter (you'll have a tiny bit leftover since you're cutting out a perfect circle).
- I liked the look of very little black in the marbling, and to achieve this, use the smallest amount of black (see my pictures of my little clay snakes as a guide).
- When rolling out your clay, pick it up off the surface at least once before cutting the final shape (otherwise it will stick and lose its shape when you try to peel it up off the surface)—also, you can flip it over if you like the marbling look of the other side better.
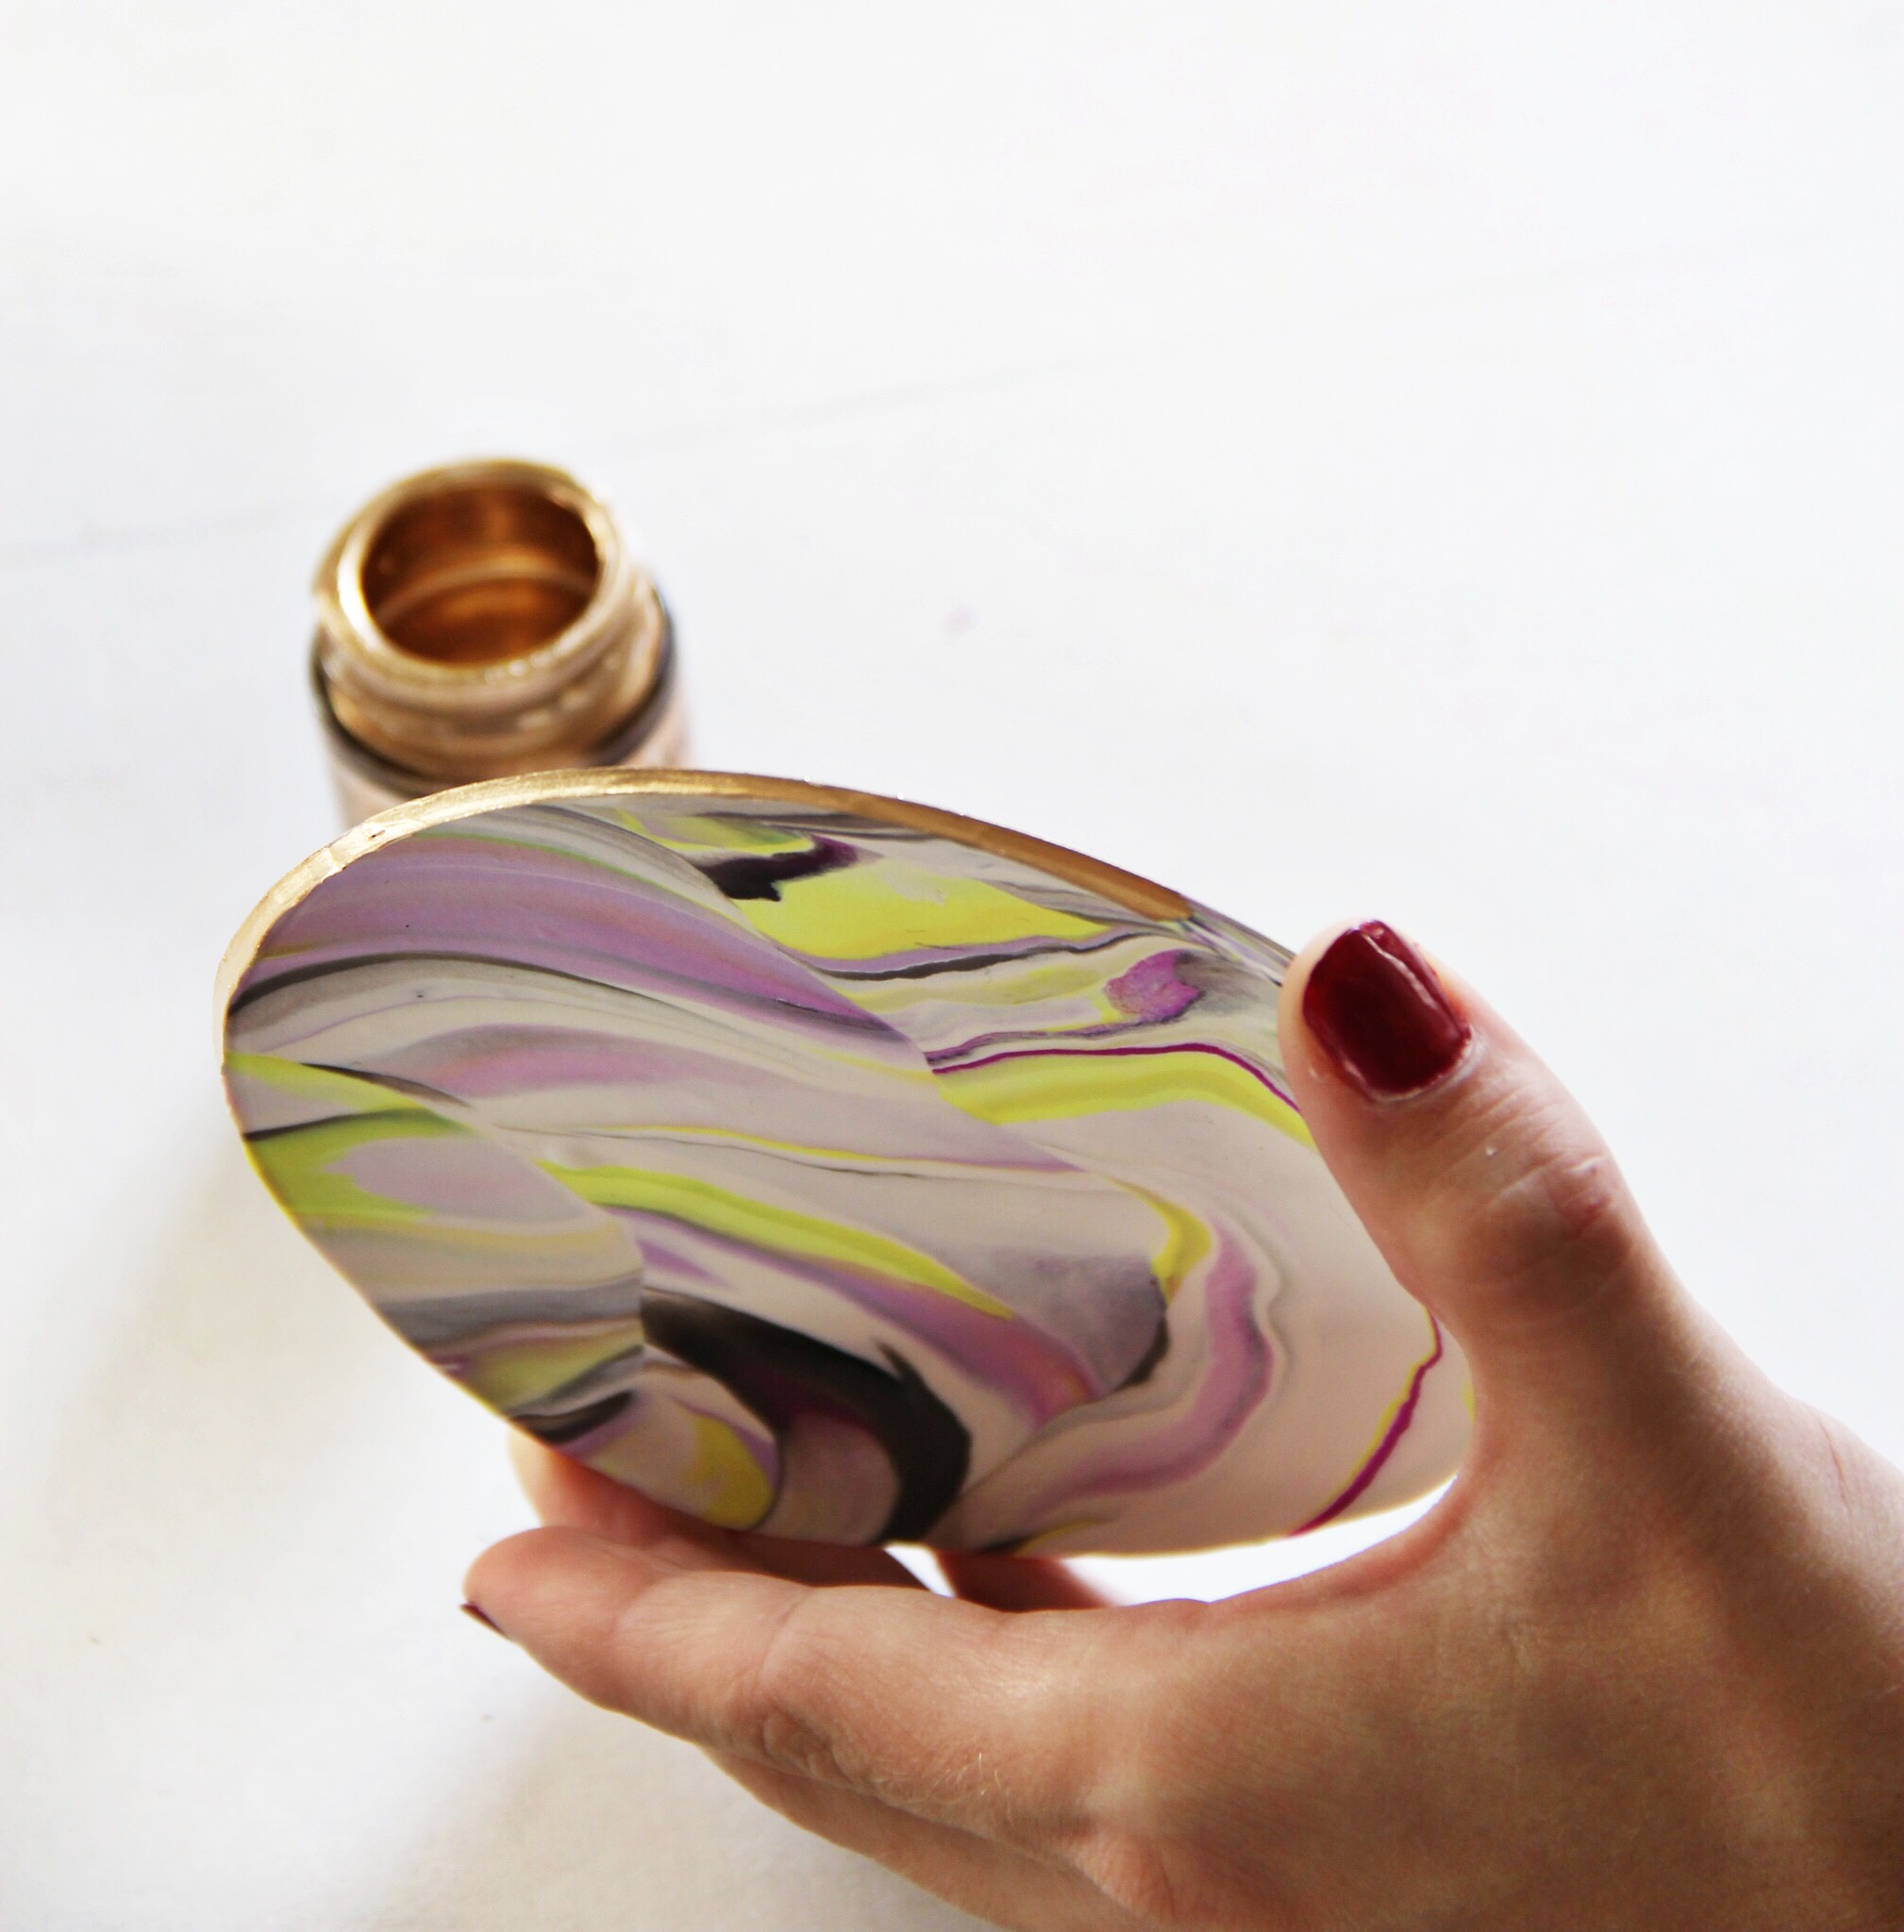
- I ended up really liking the look of a rougher edge once it was painted in the gold leaf (conveniently—because that certainly wasn't on purpose) but you can also work to really smooth yours out if you want a more finished edge.
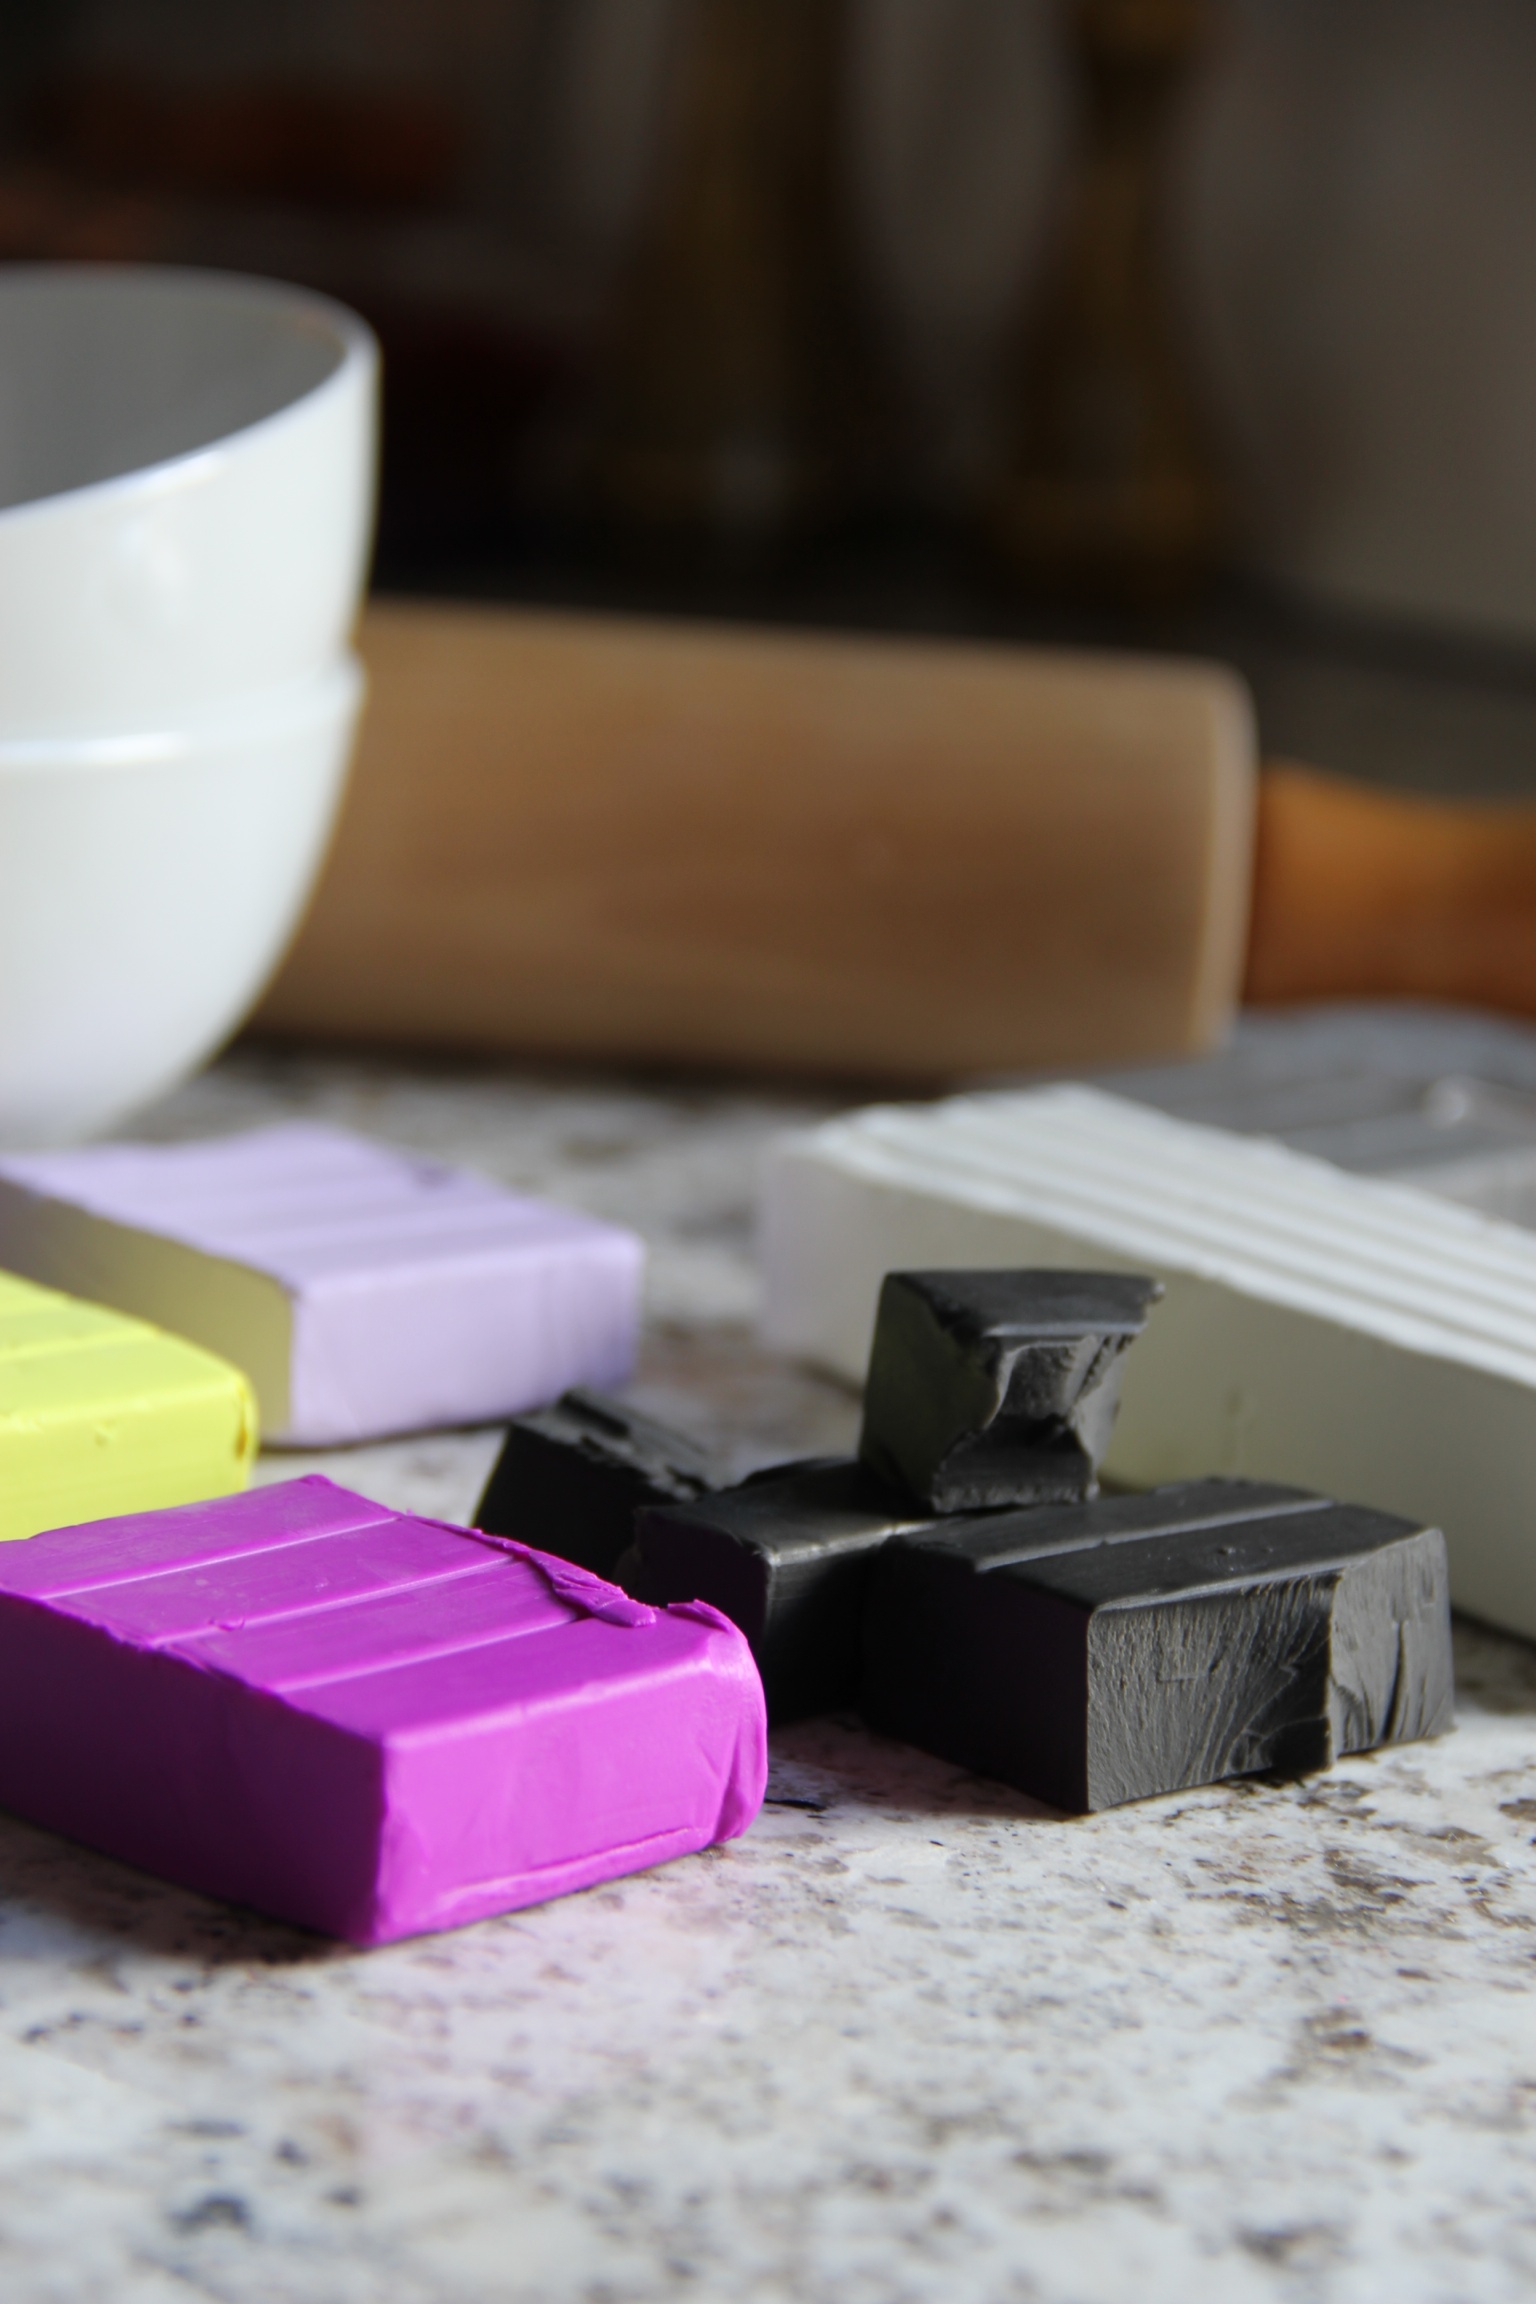
Here's what you'll need
Variety of colored clay, plus a large amount of white clay (you need at least 2.5 oz clay total per dish)—I used Sculpey
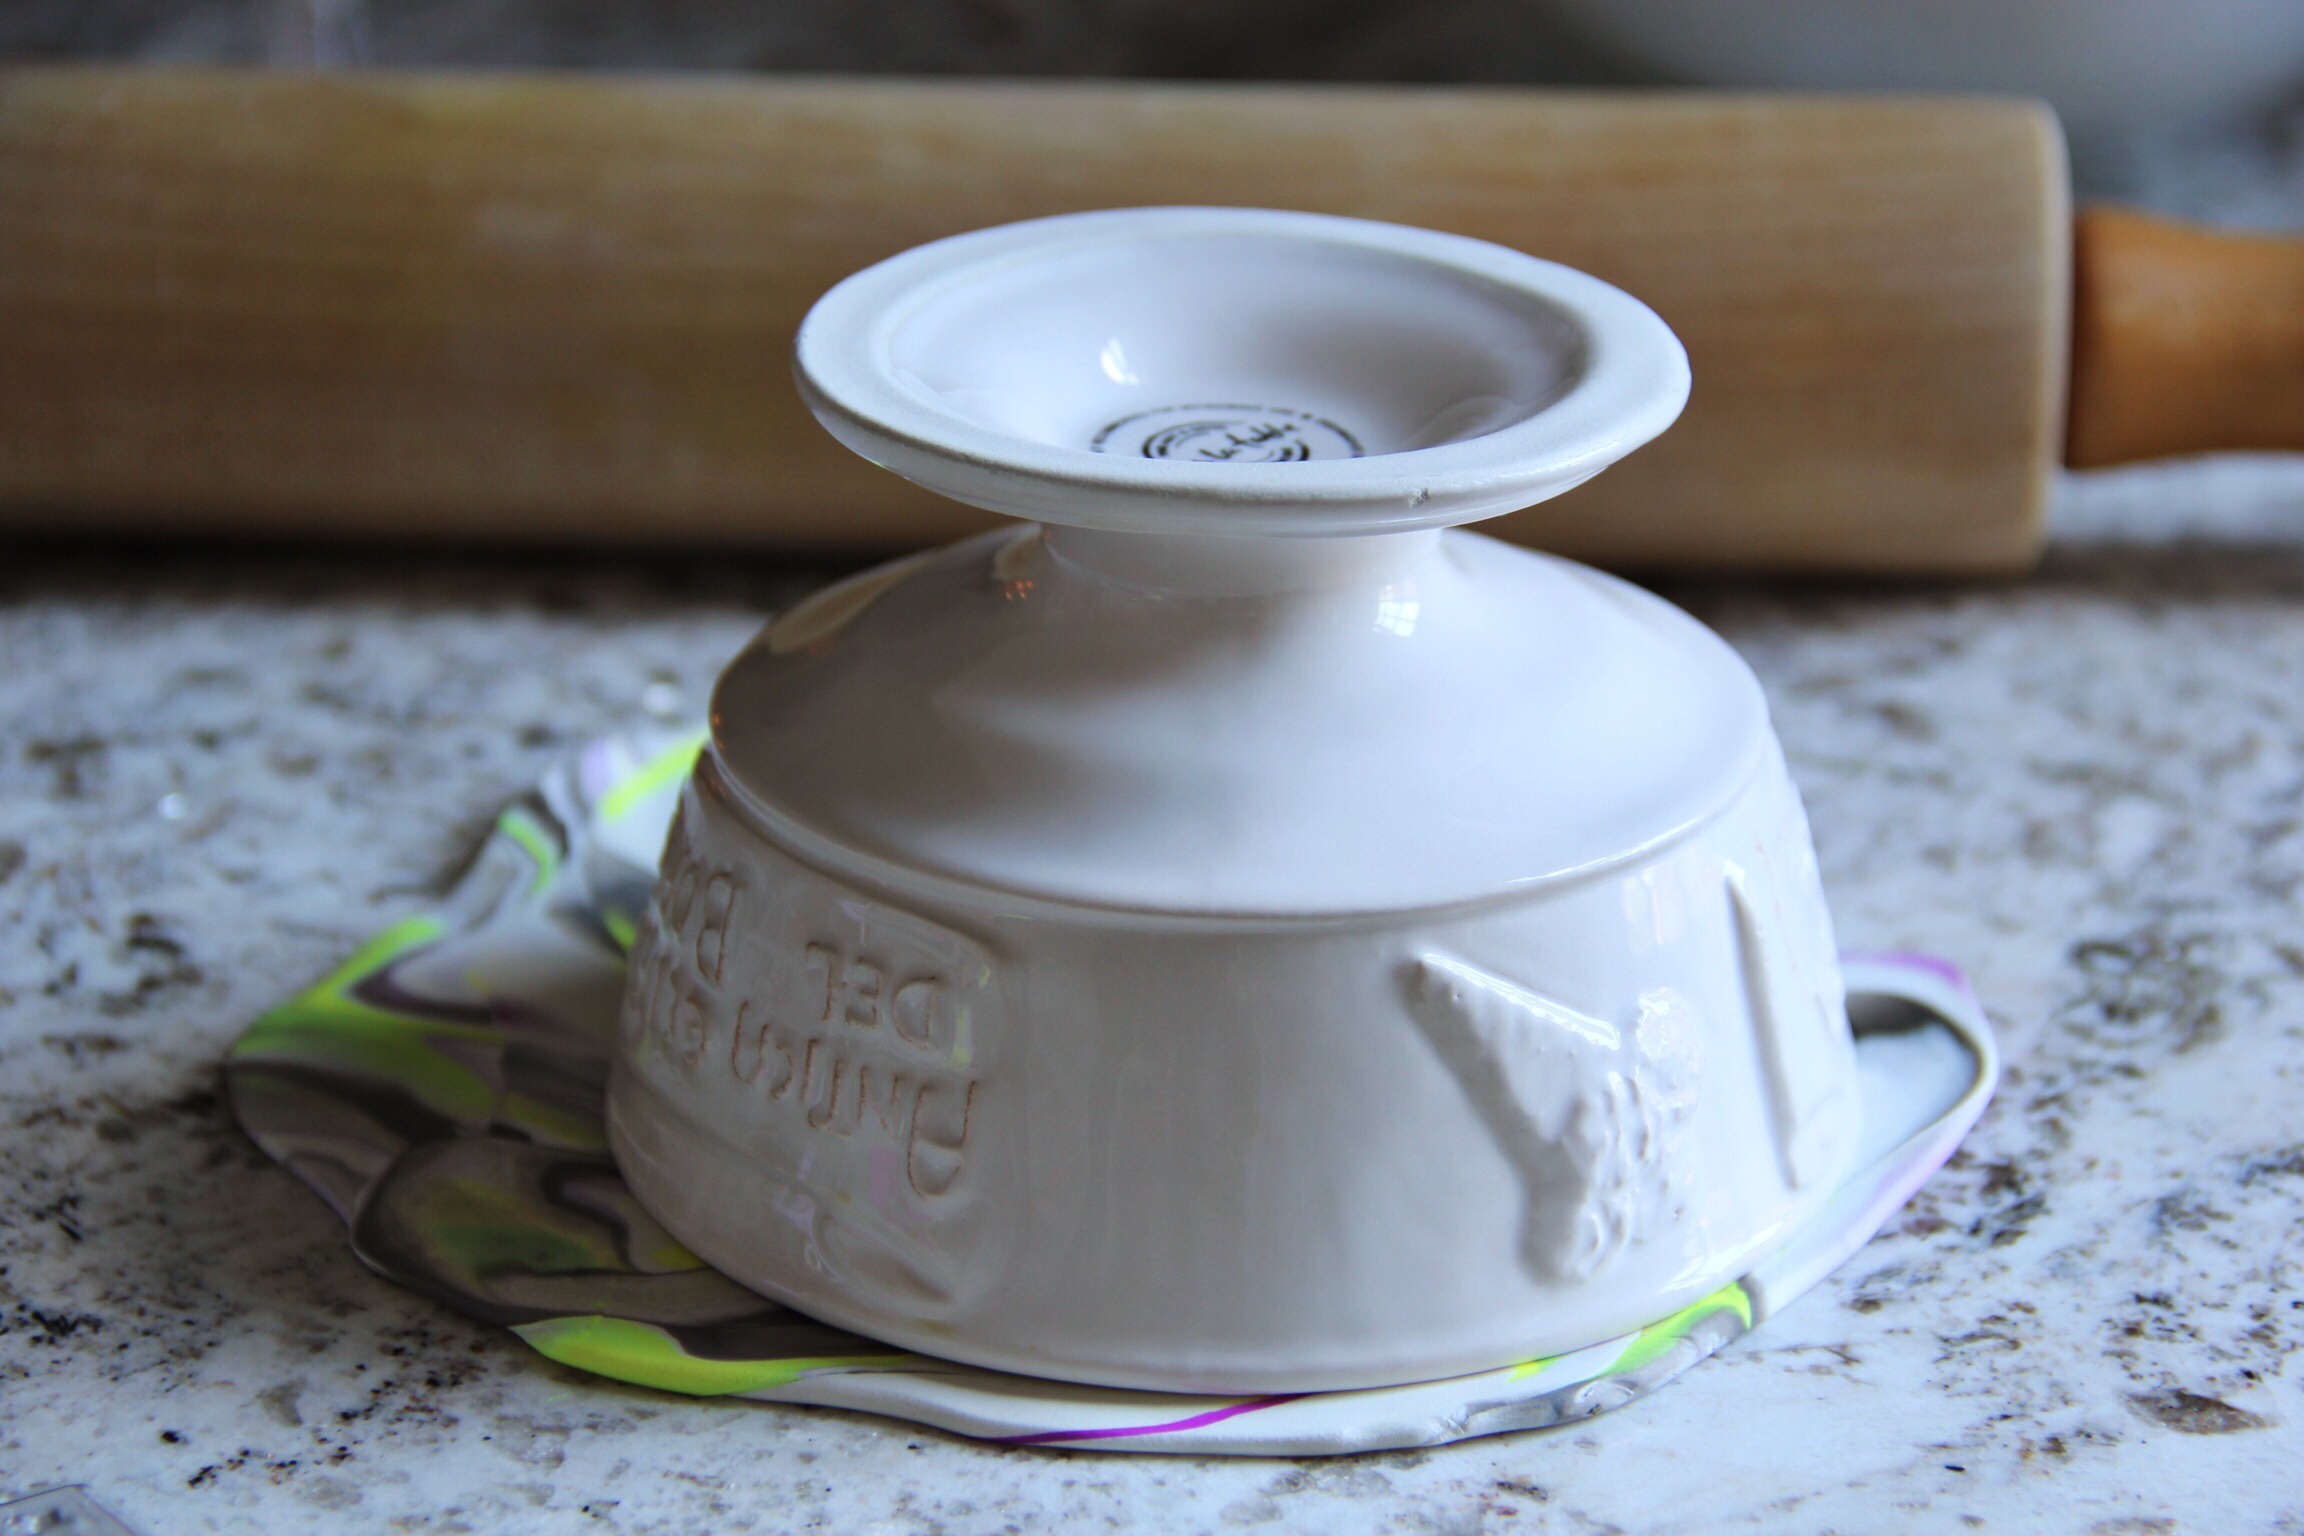
Oven-safe bowls or any other vessels to use as a mold for baking your clay dishes
Stencil for tracing the clay, and it should ideally be slightly bigger than your oven-safe bowls or vessels, so that clay circle edges up the sides of the baking vessel a little bit, to create a higher lip (this is preference—you could make dishes as shallow or as deep as you'd like—just use molds accordingly). I used an ice cream bowl.
Something to cut the clay with—I used a razor blade, but any kind of knife or clay cutting tool would work
Rolling pin or something to roll the clay out
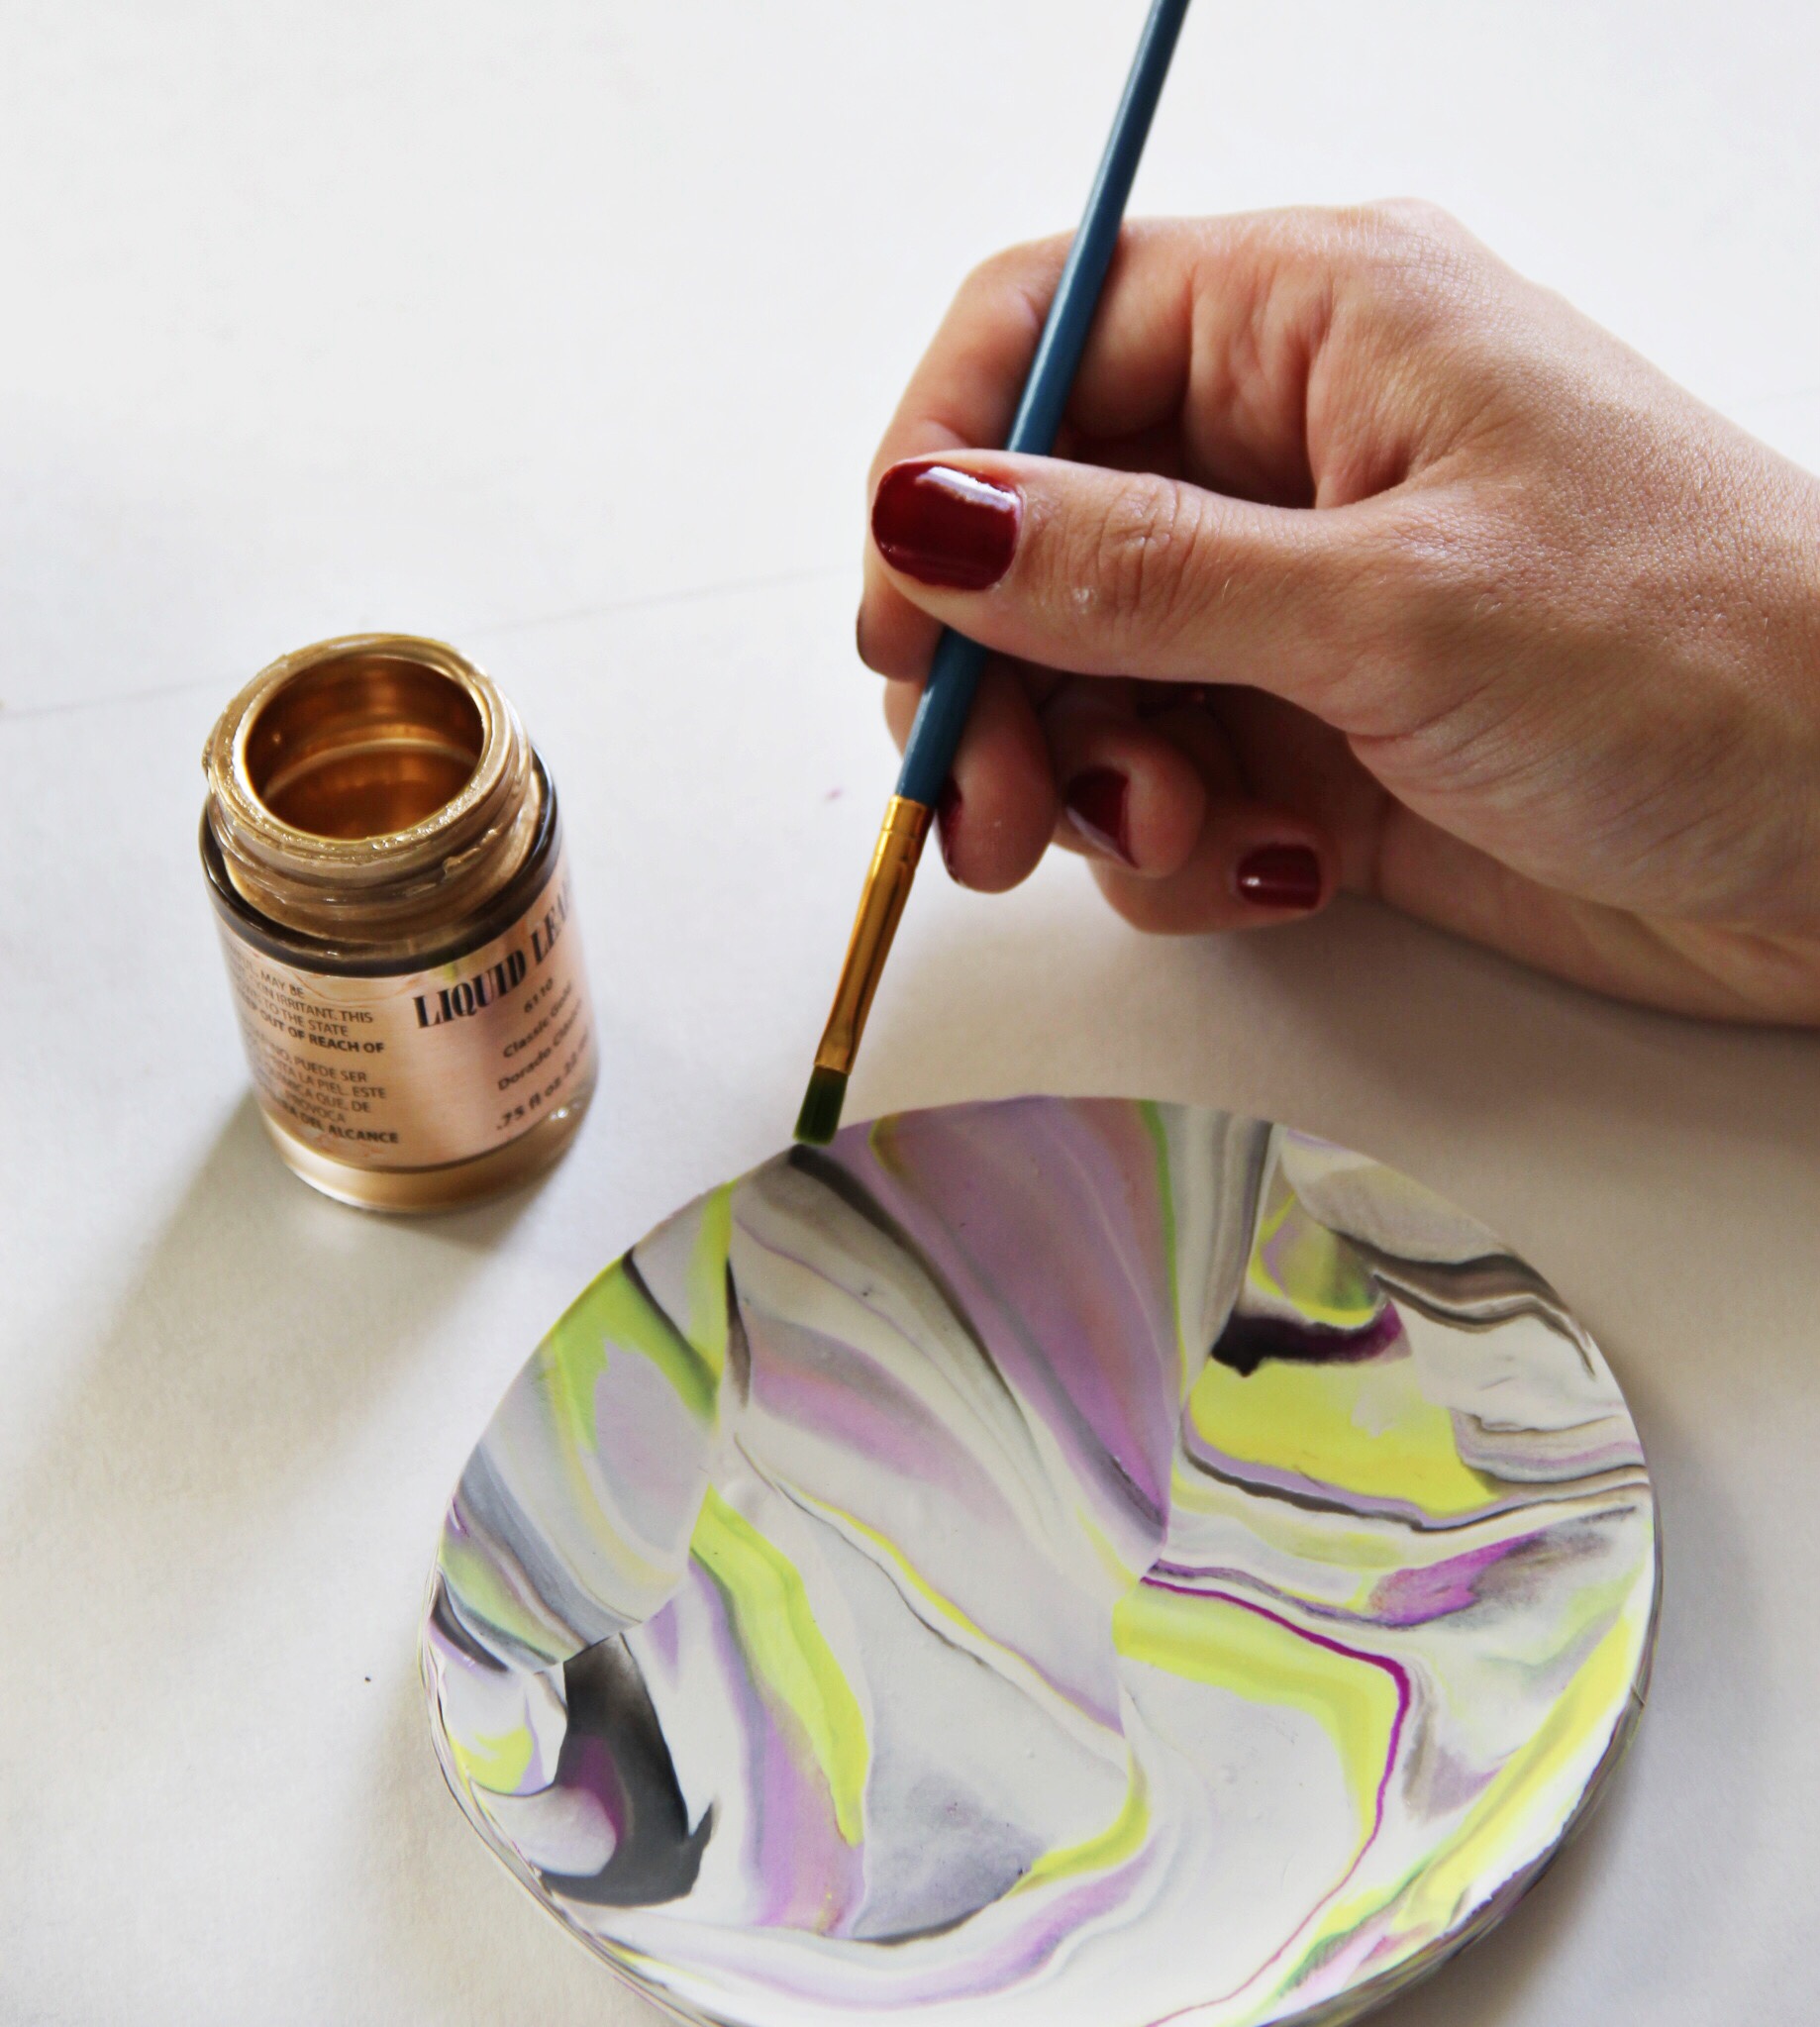
Gold leaf paint and paint brush for painting edges of dishes
Using the pictures above as a guide, follow these steps
- Using the instructions printed on your clay's packaging, preheat the oven.
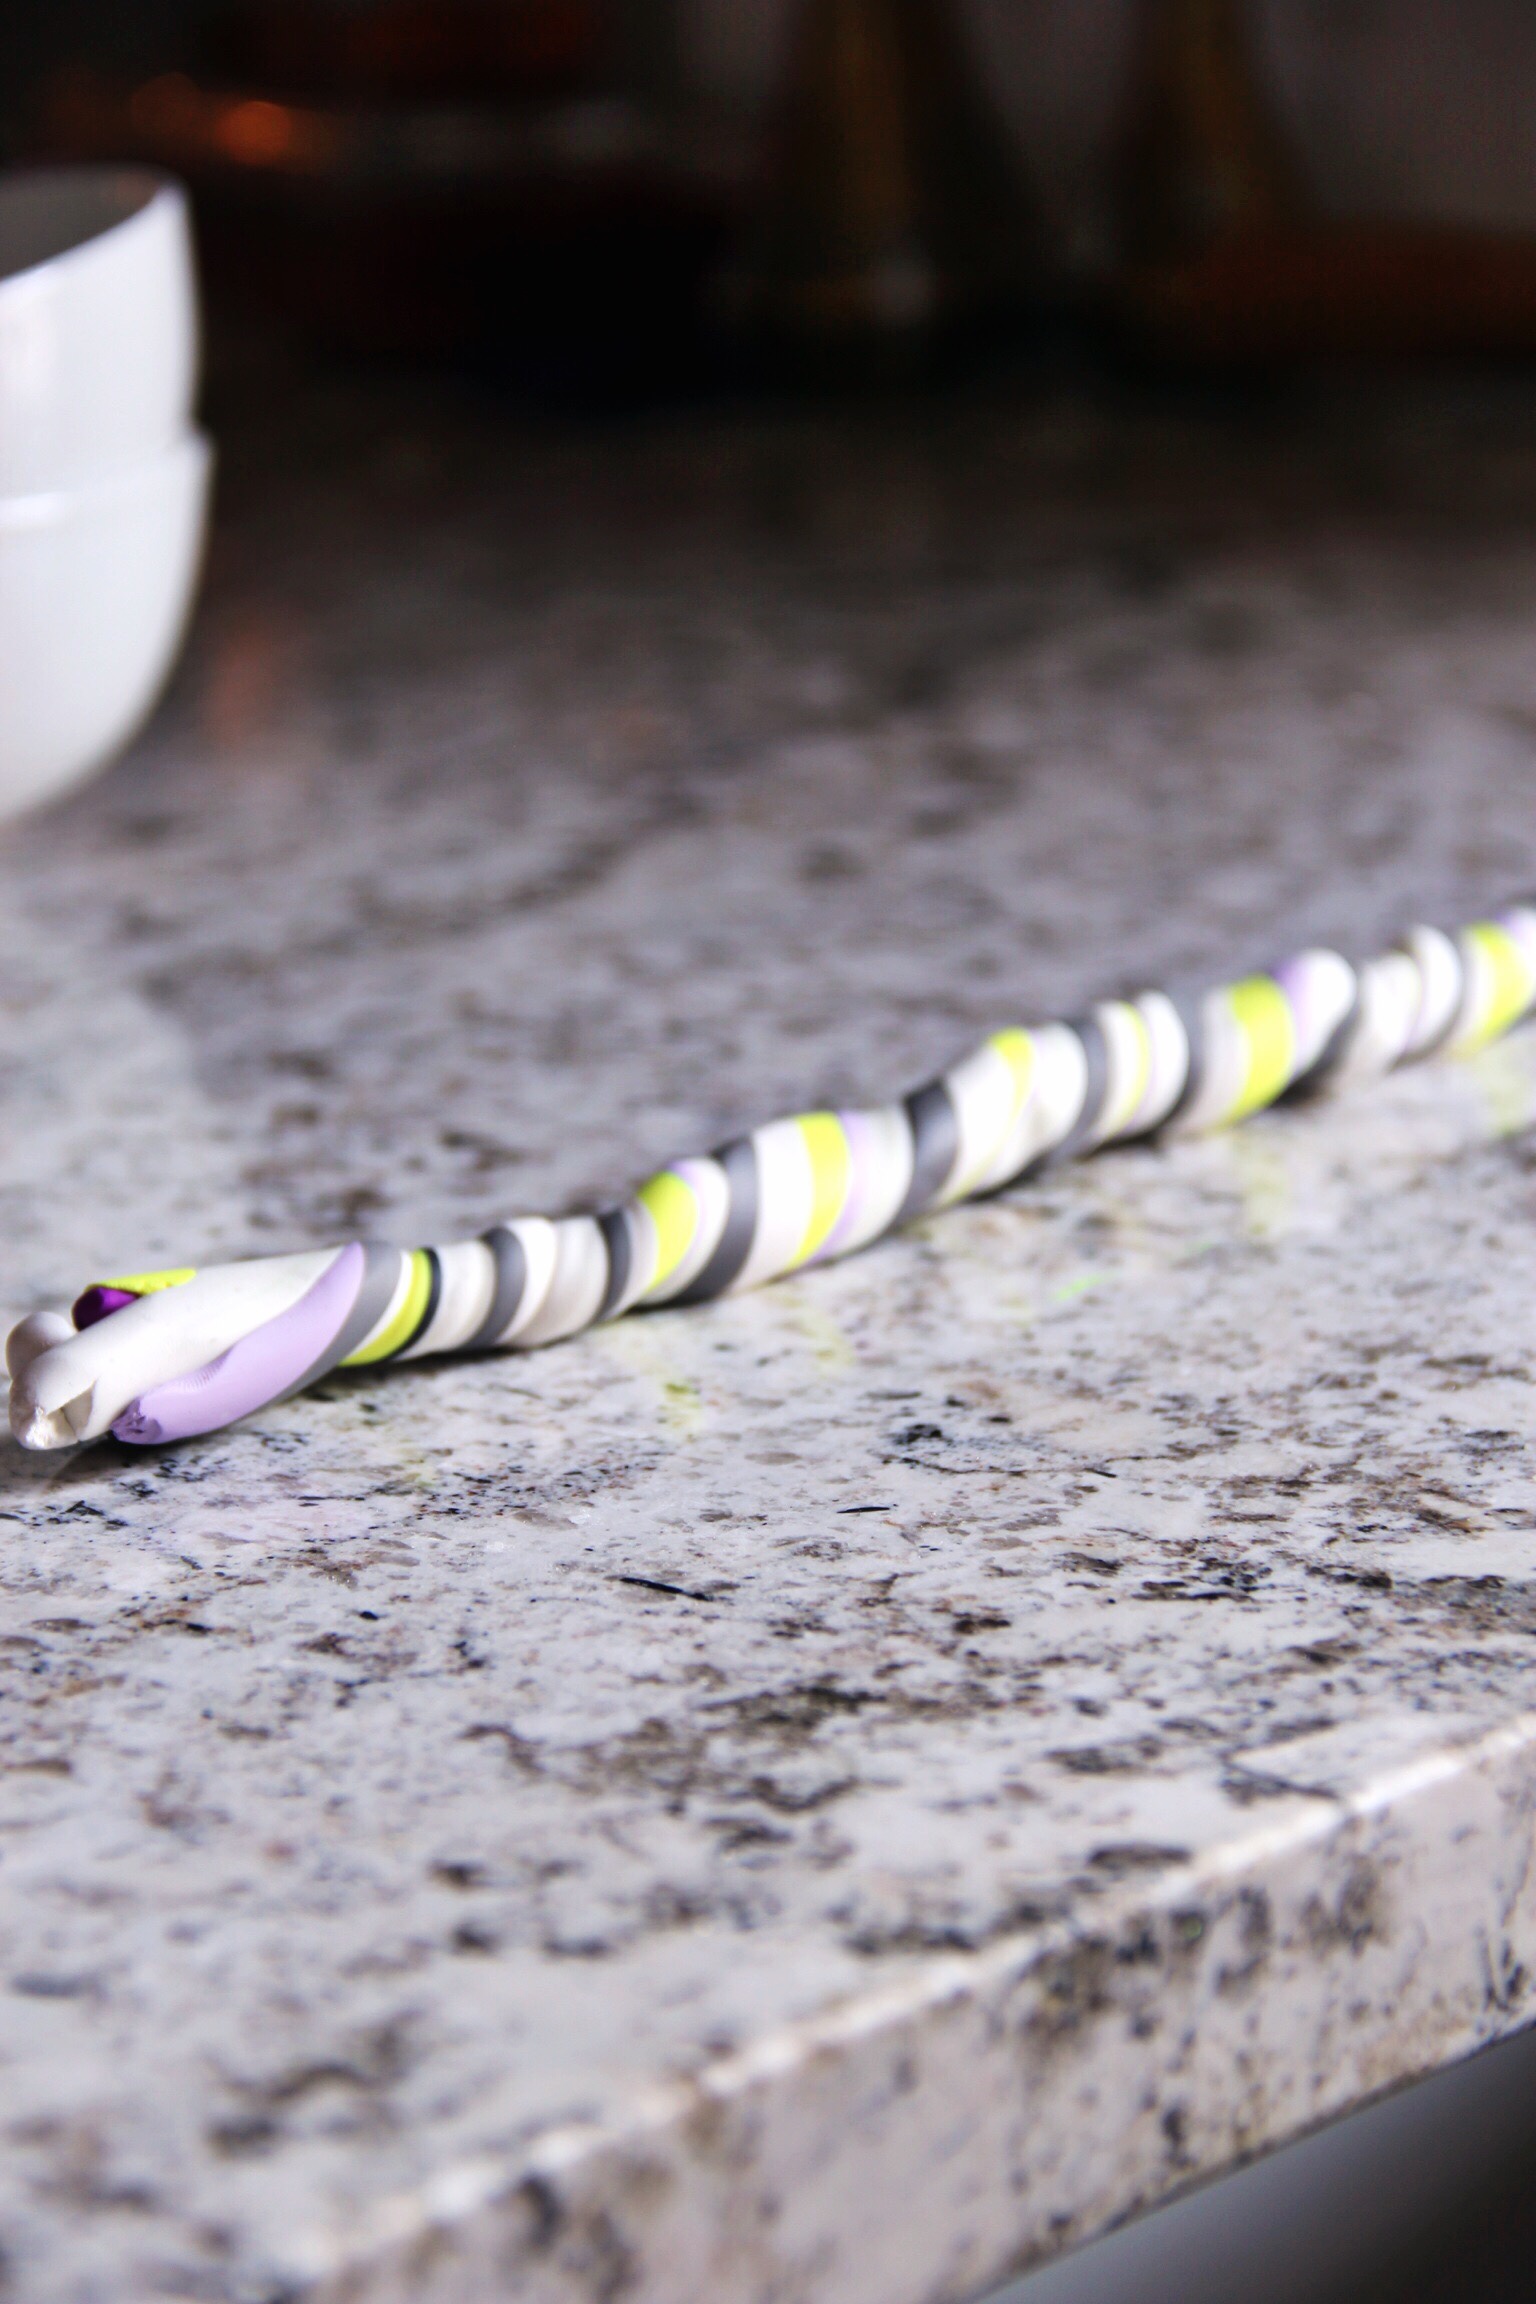
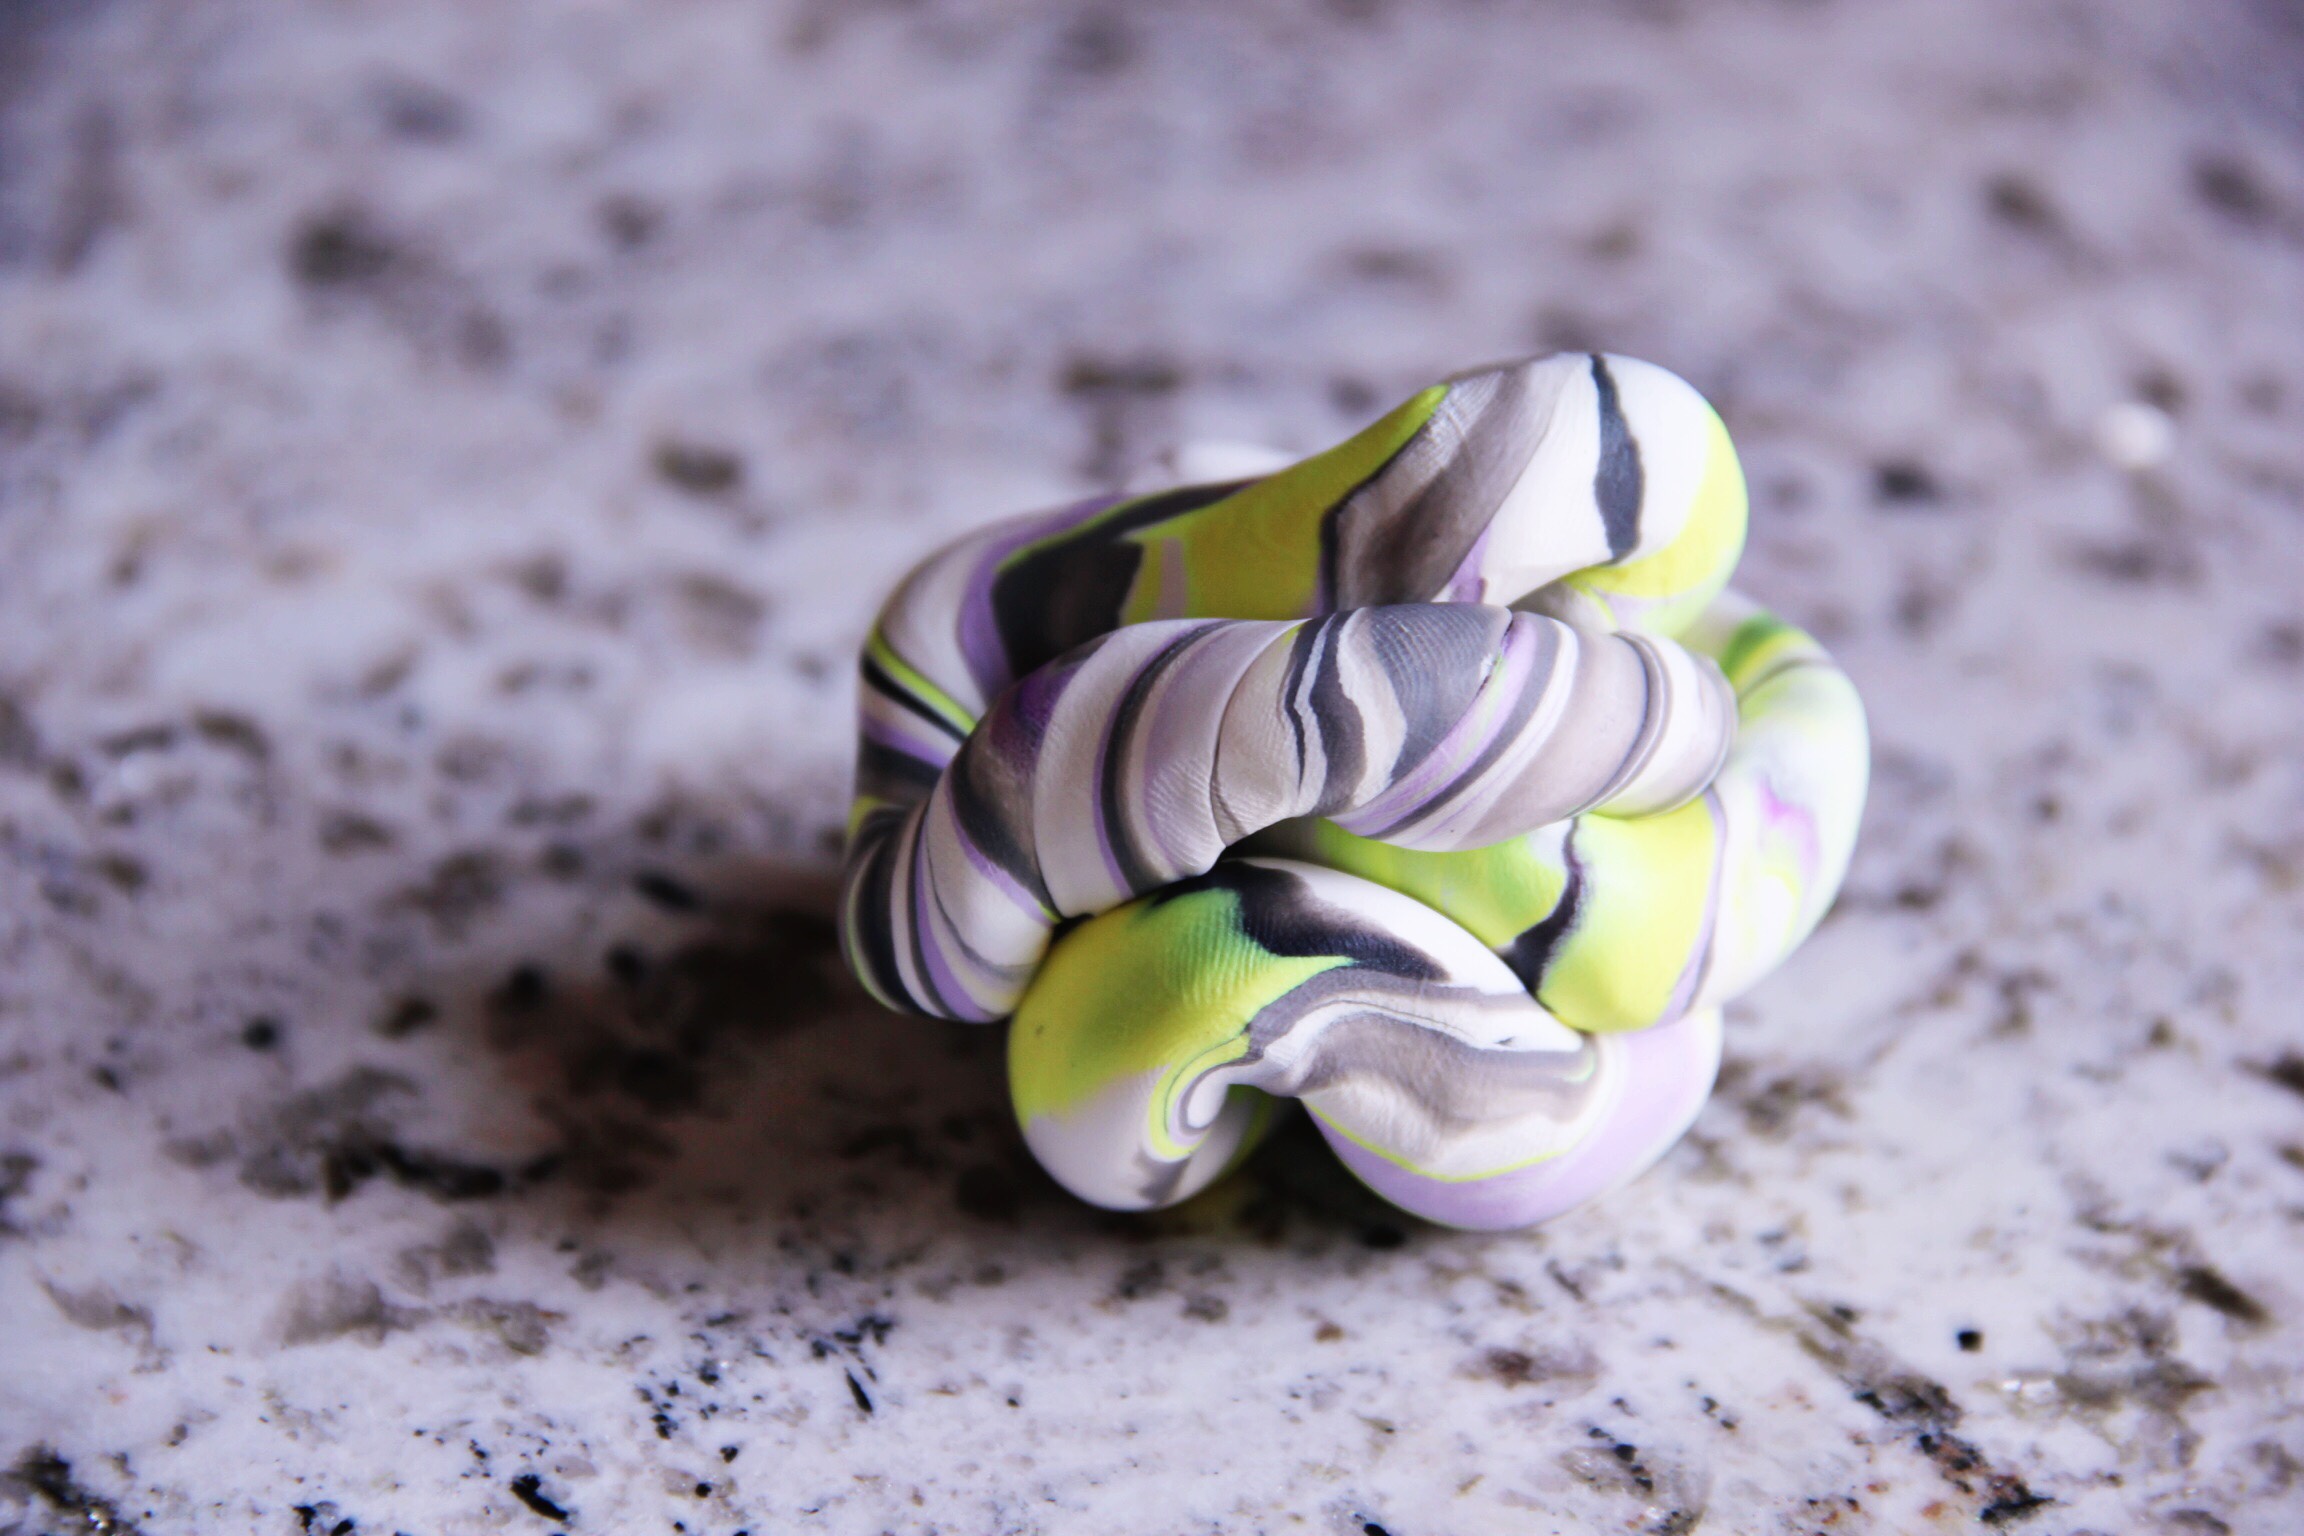
- On a safe, non-stick surface (I used granite), use your hands/palms to make different sized snakes of clay, all about 6 inches in length, following my tips discussed above. Also, be sure to wipe hands clean between rolling each color, because you don't want bits of different clay colors to mix.
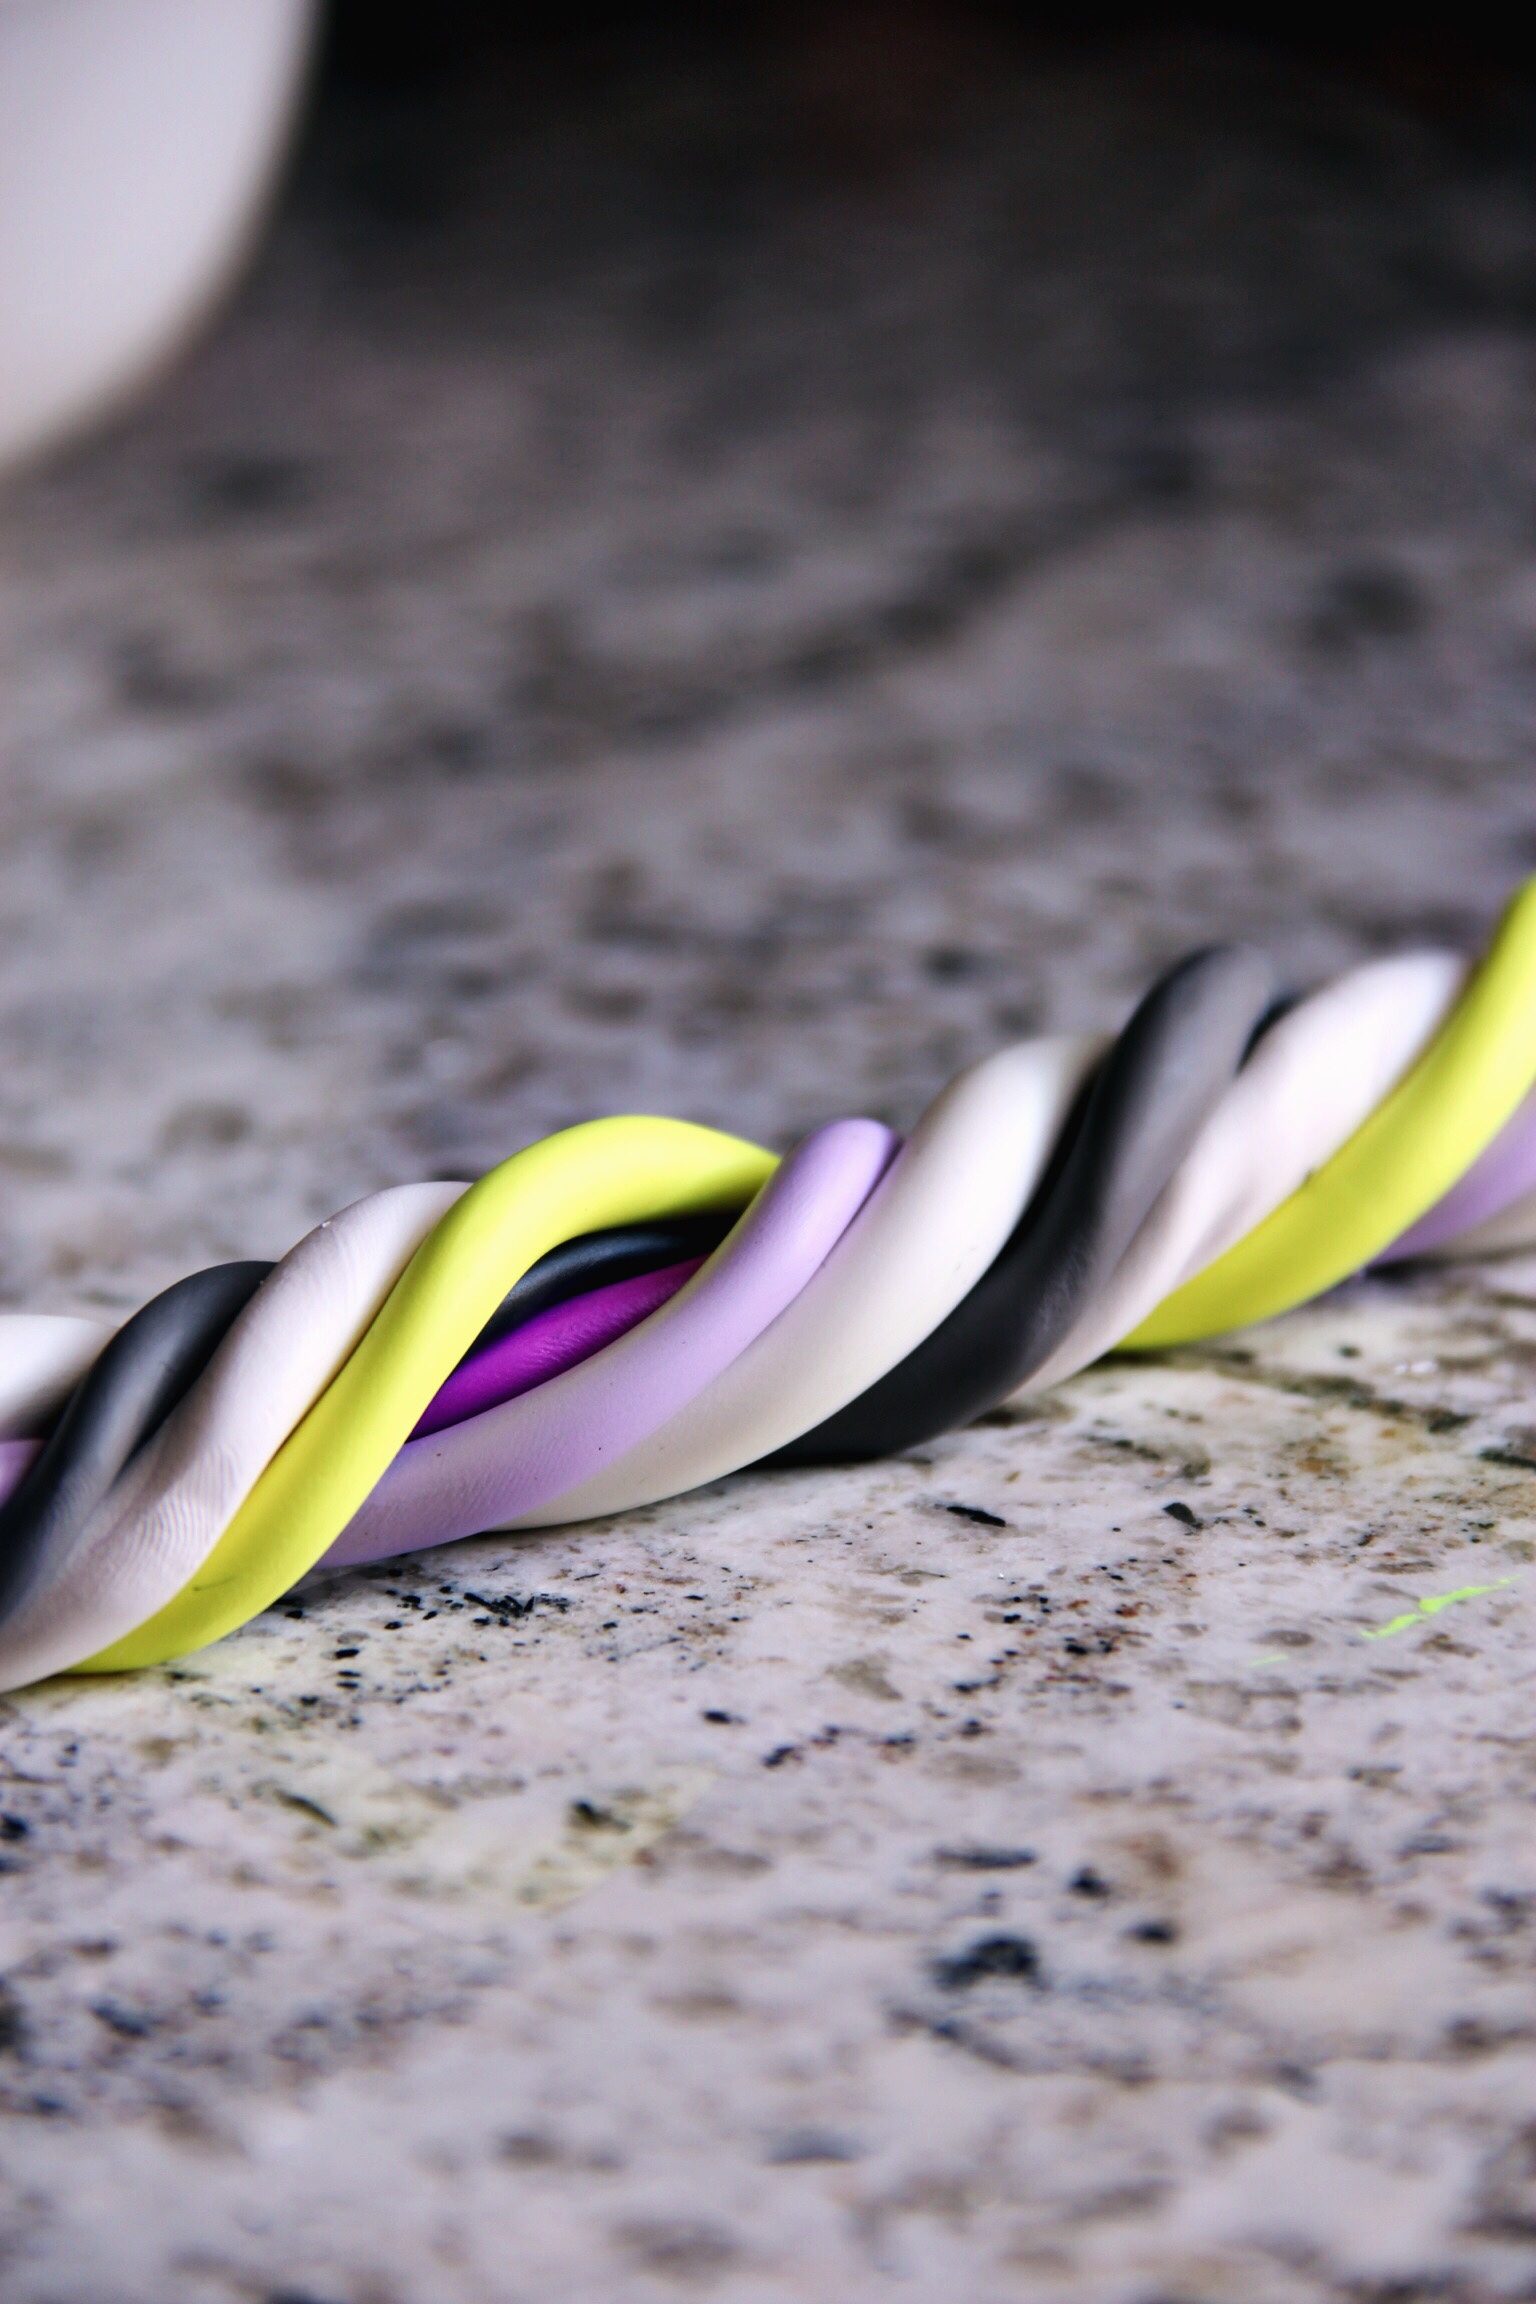
- Line up pieces together in one big snake, and begin twisting together (you still want to be able to see every color if possible, or at least a peek of each).
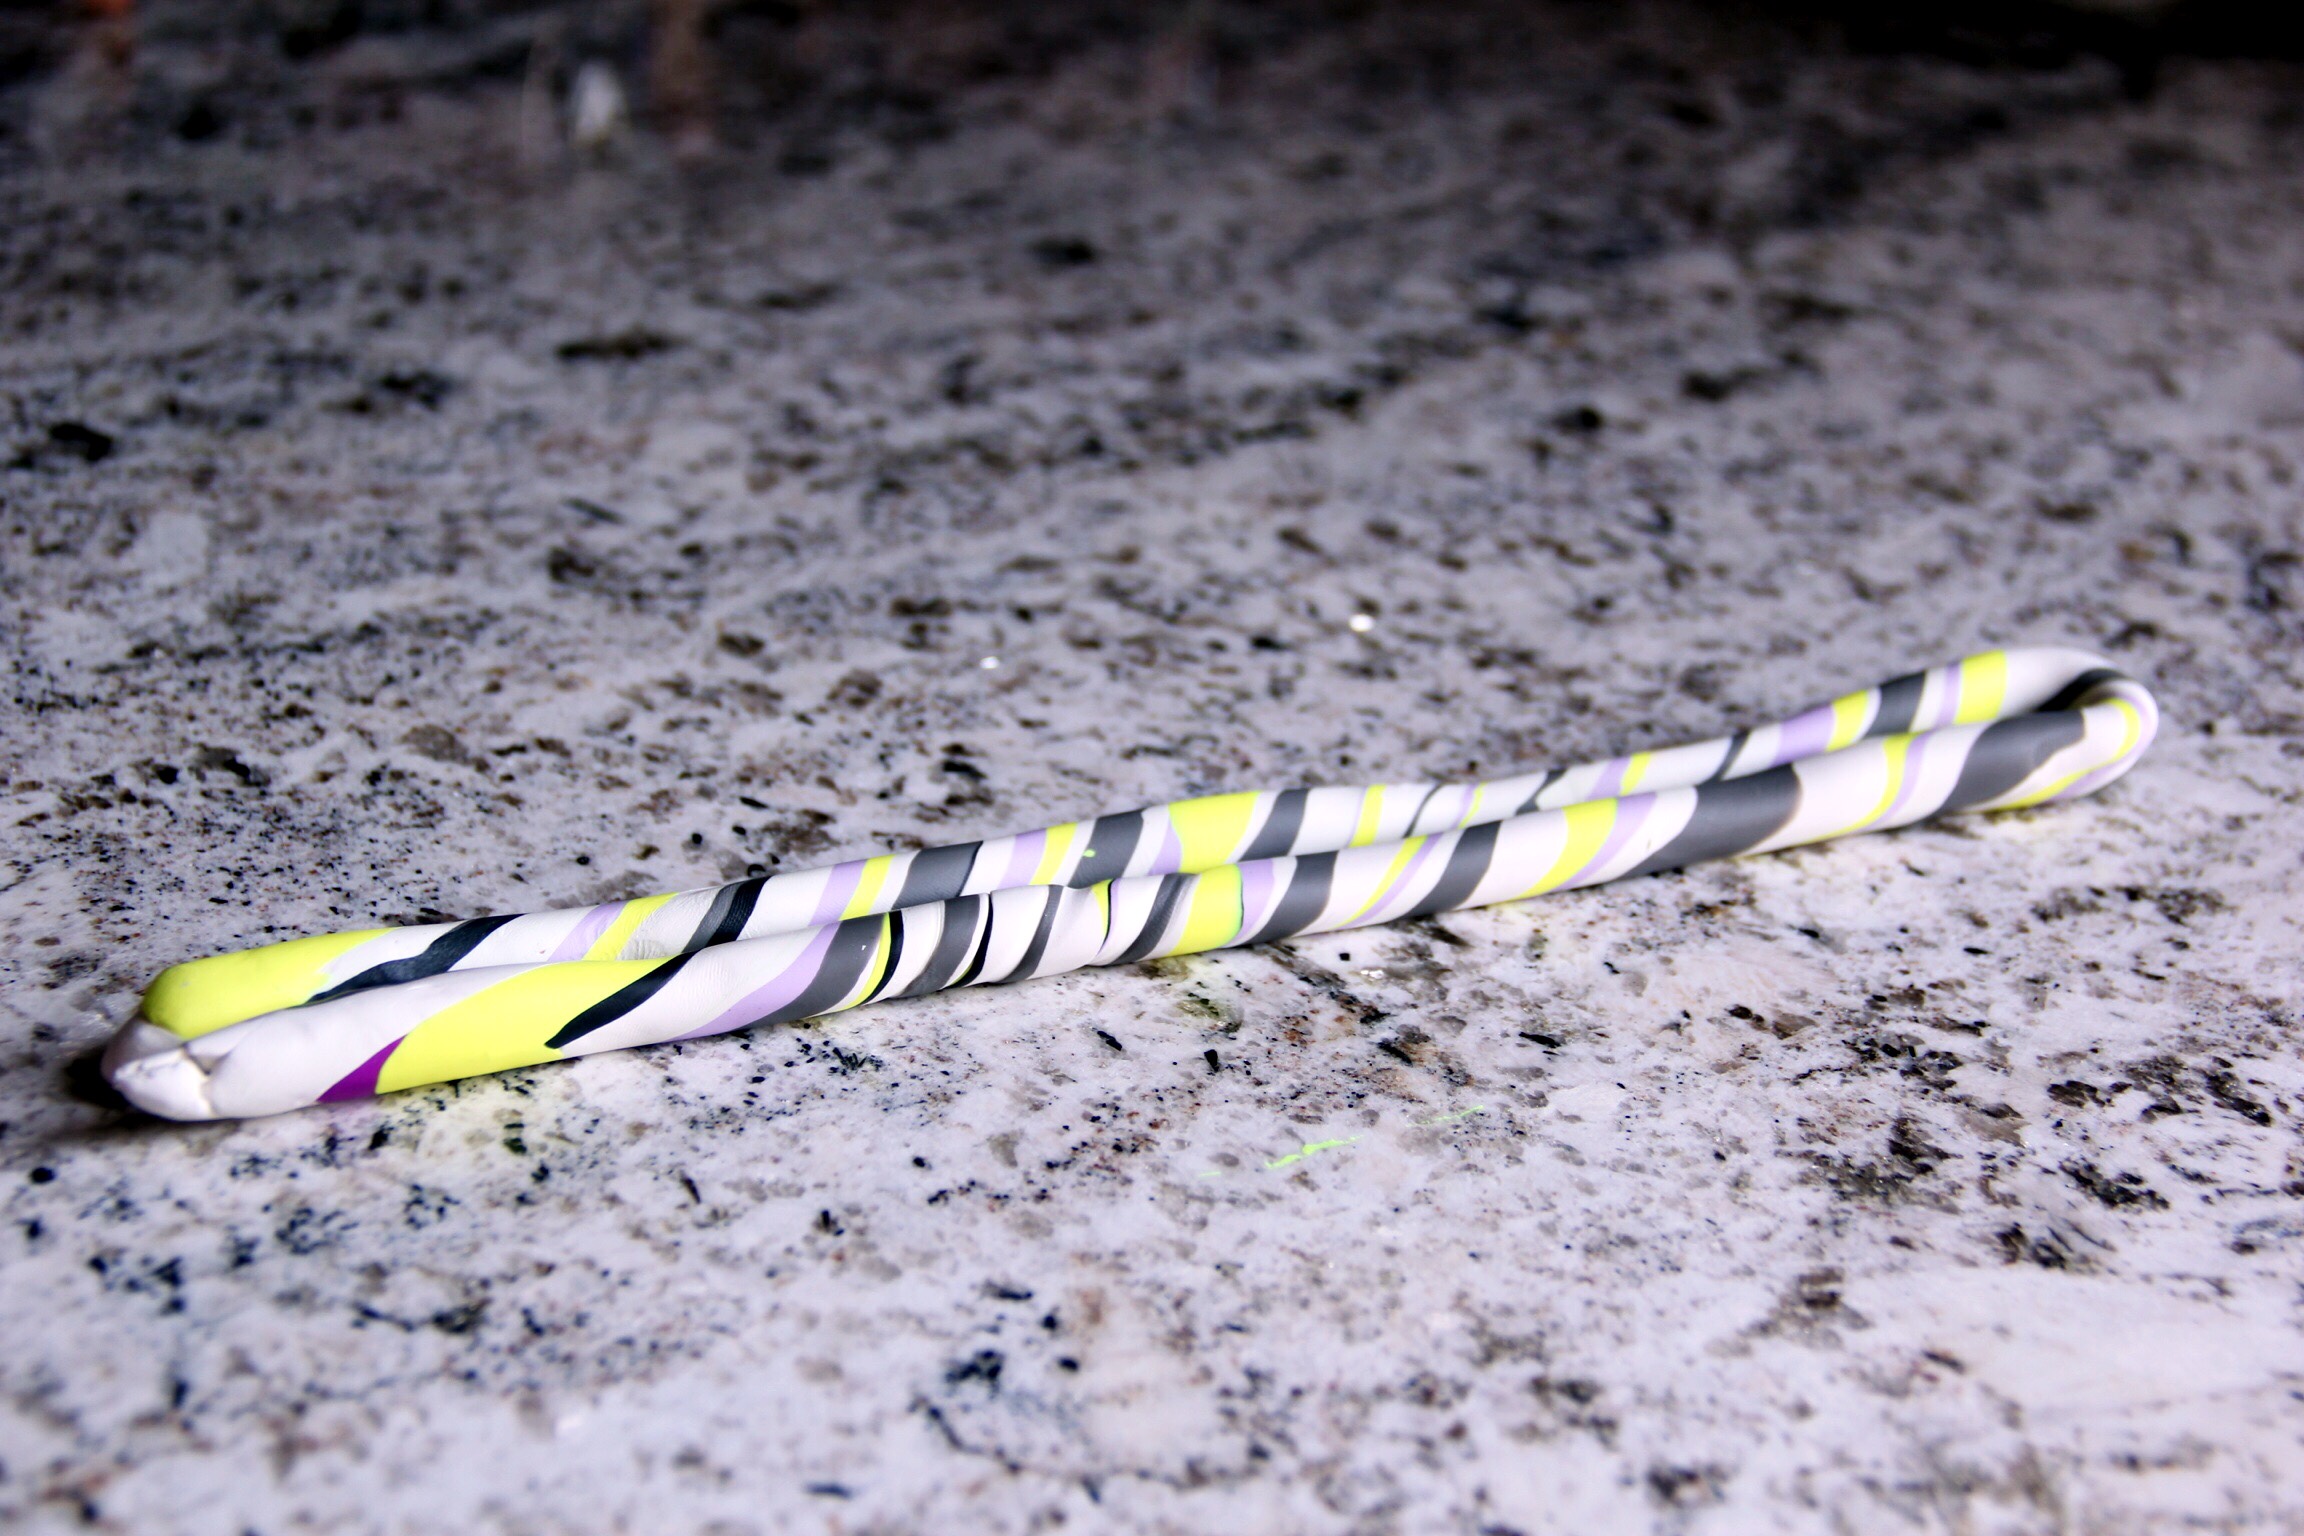
- When twisted, roll out with palms for a second, and then using your fingers at the ends of the snake, and then into the middle, twist again to create a sort of candy cane effect throughout the snake. Roll out again, and twist again. Do this until the snake has doubled in length.
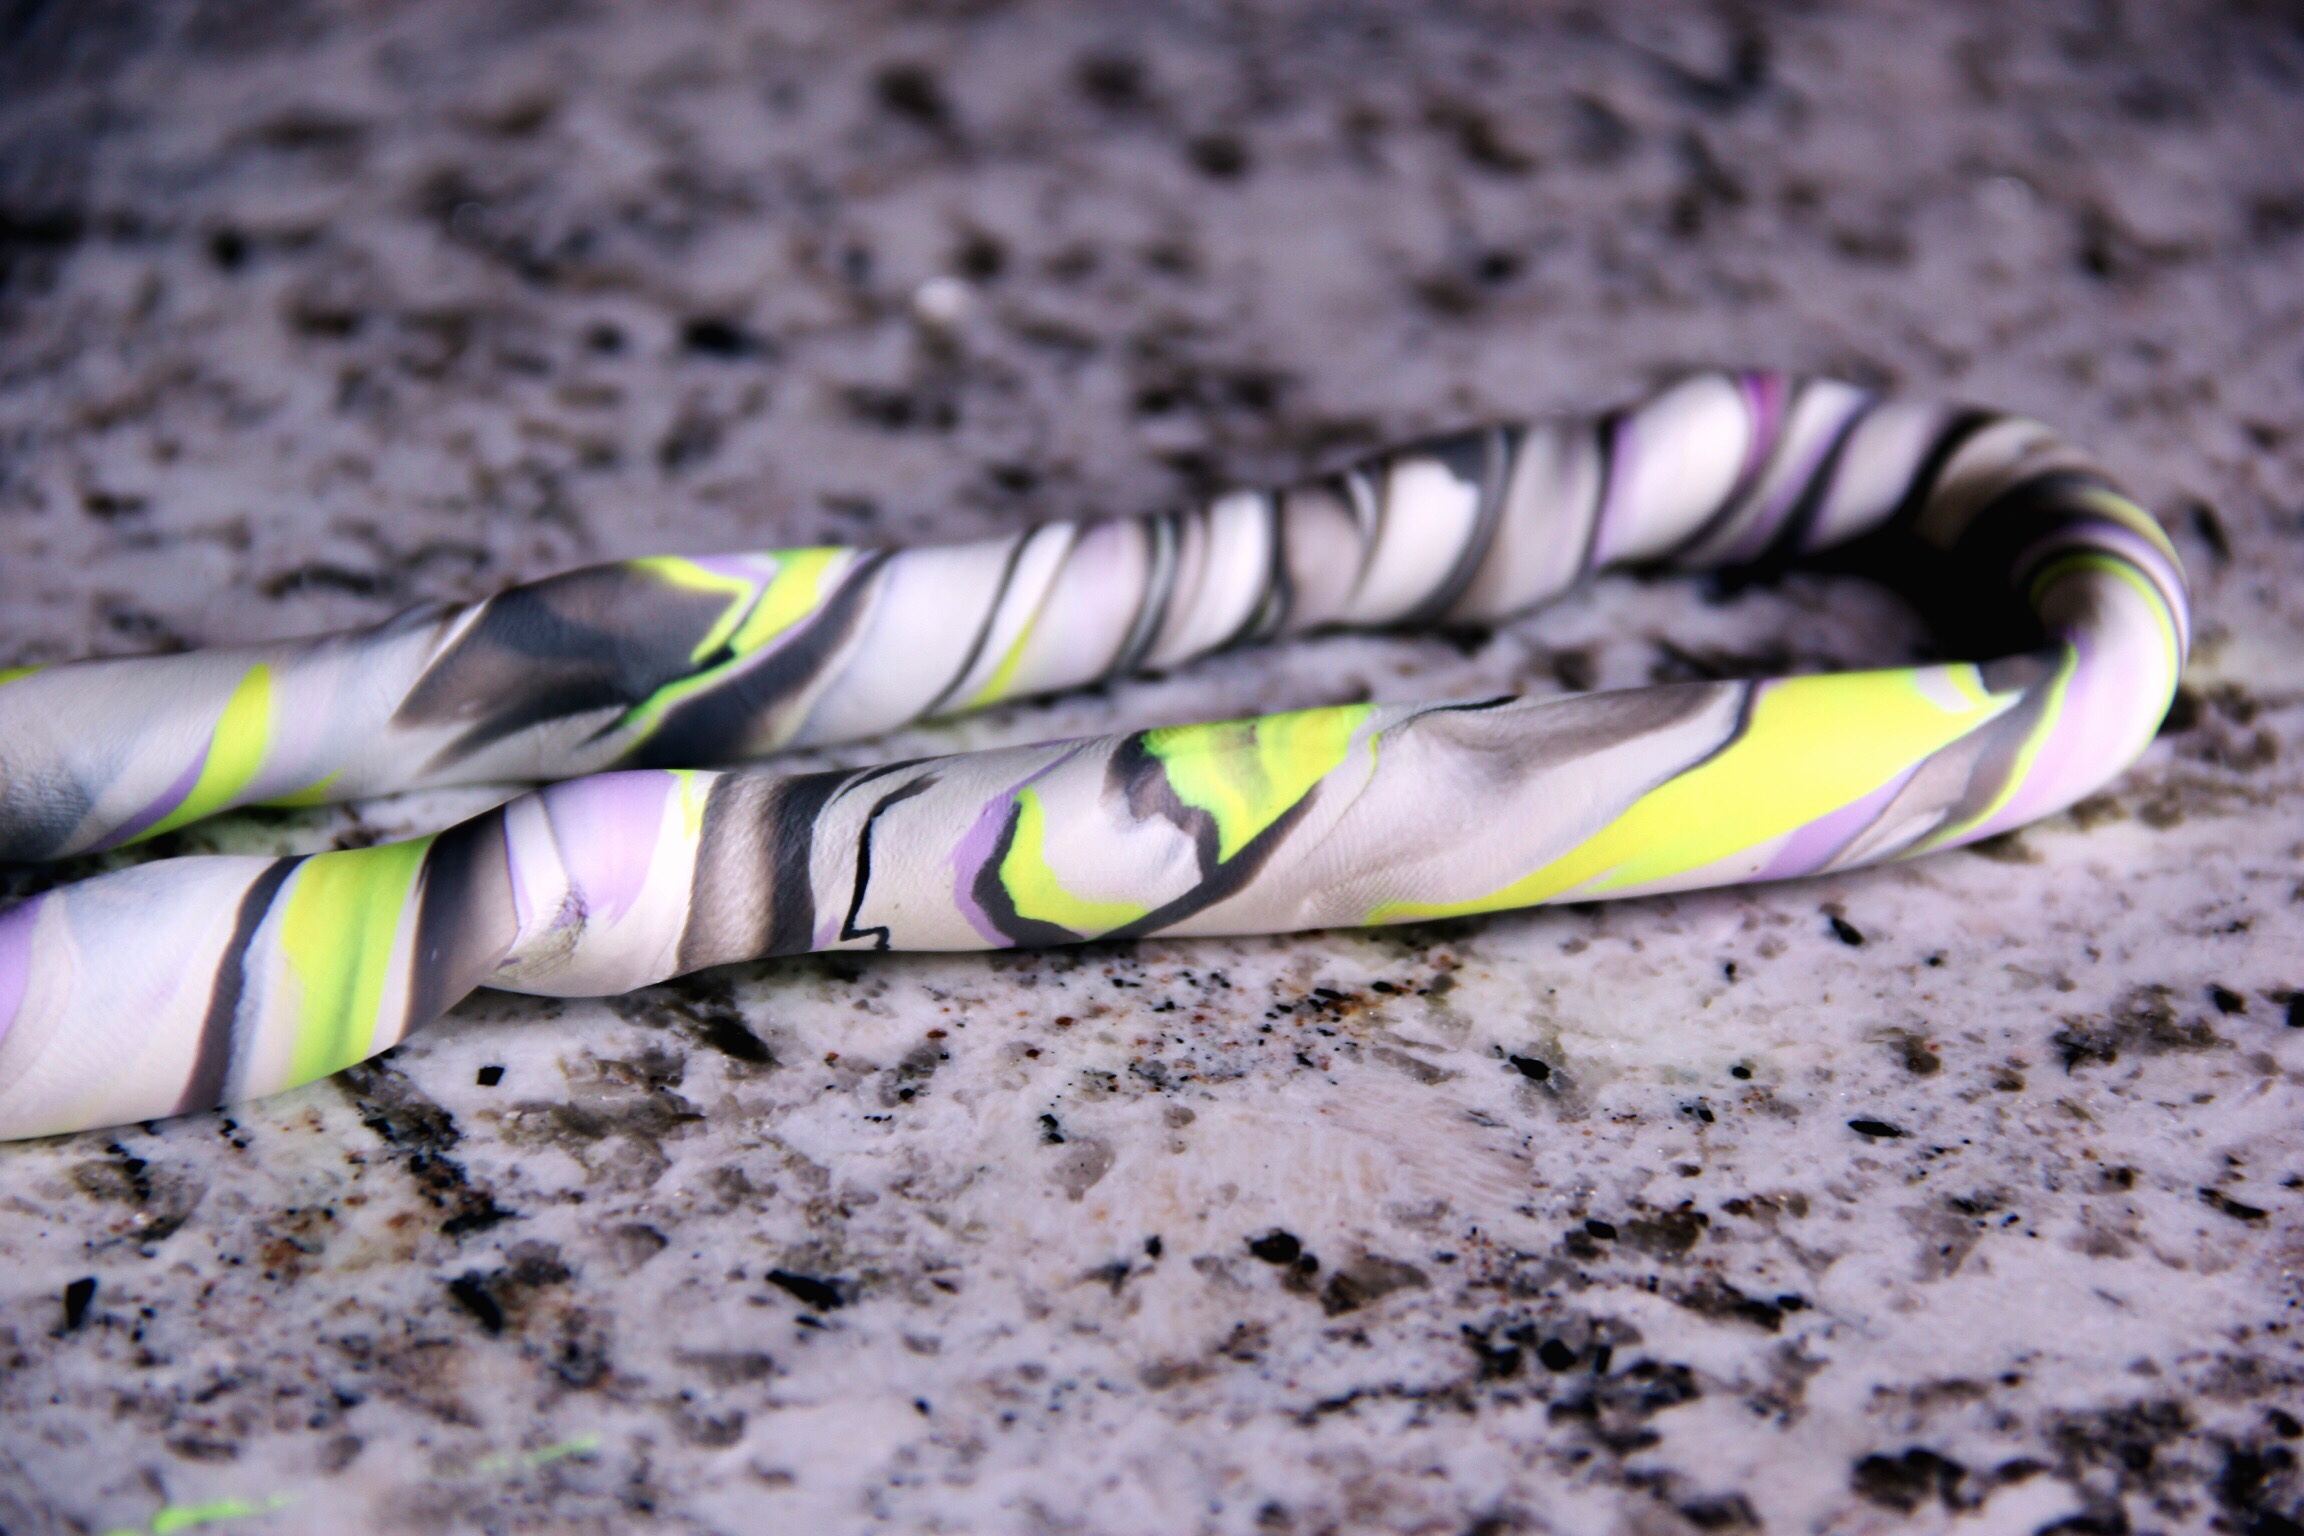
- Fold in half (as in the picture), and repeat step 3 again (twisting and rolling).
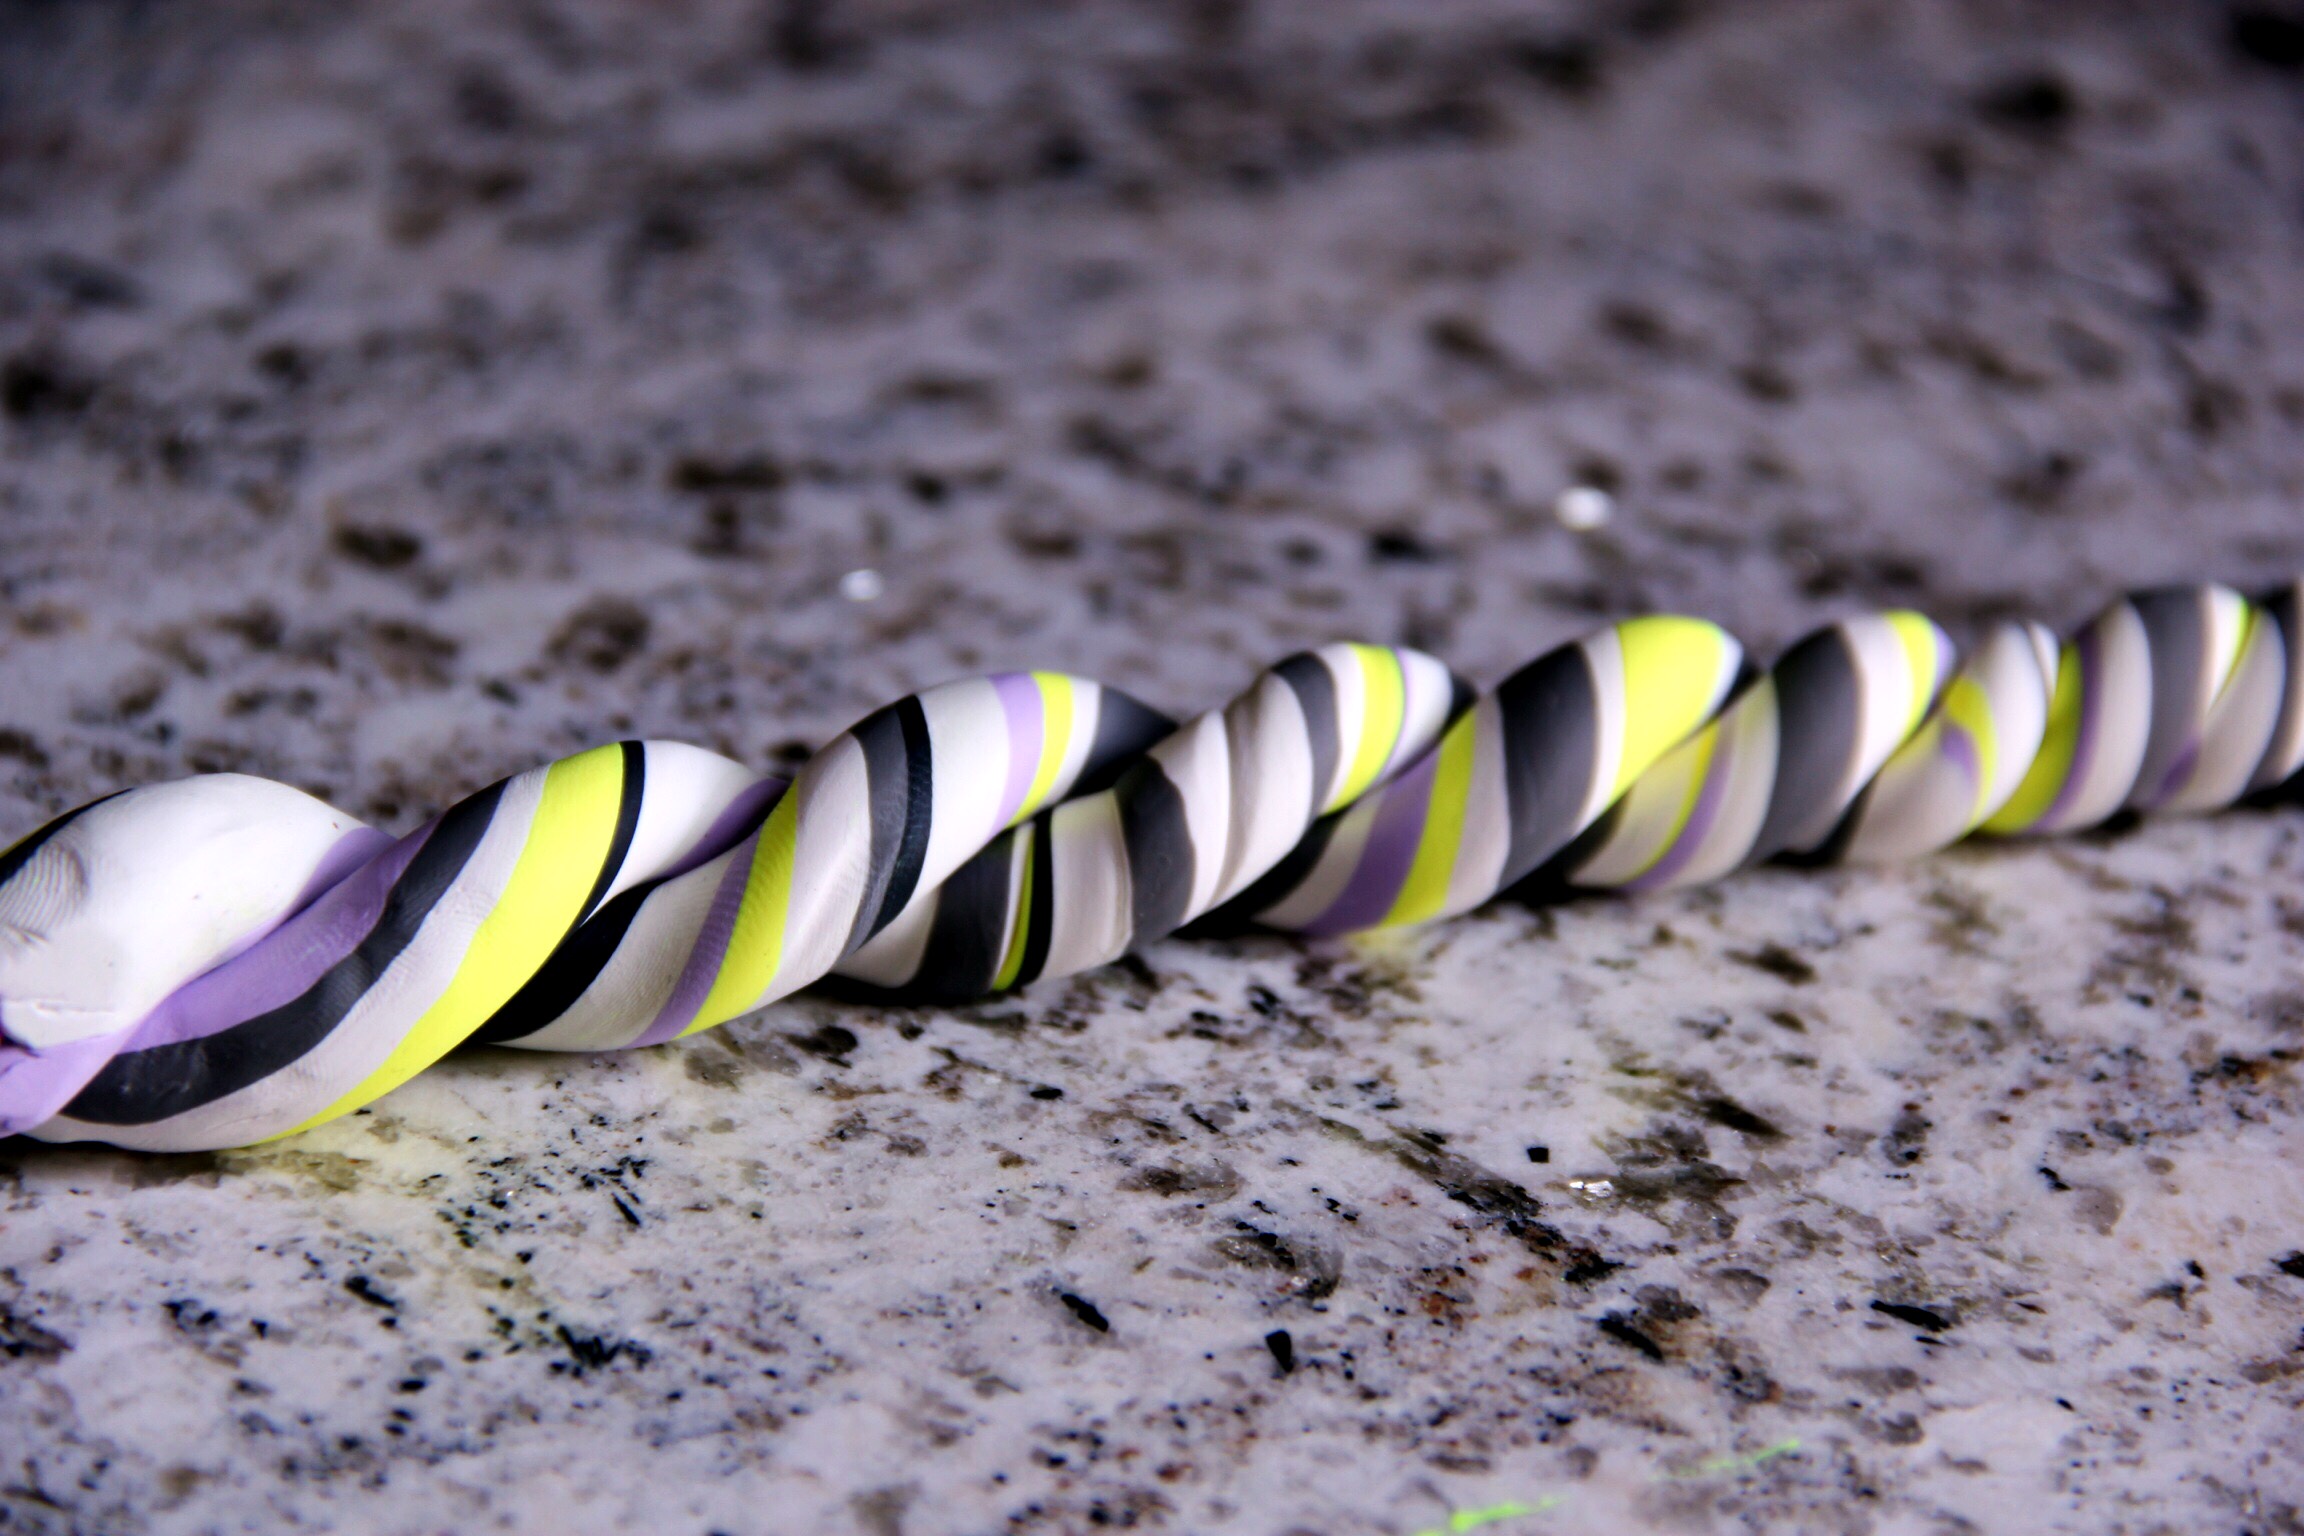
- Repeat process a couple of times, I'd say 3-4 times total, until colors look like marbled lines, but are still distinctly separated (if you over-roll, colors begin to look a little more cloudy—of course, if you prefer that look, then go for it!)
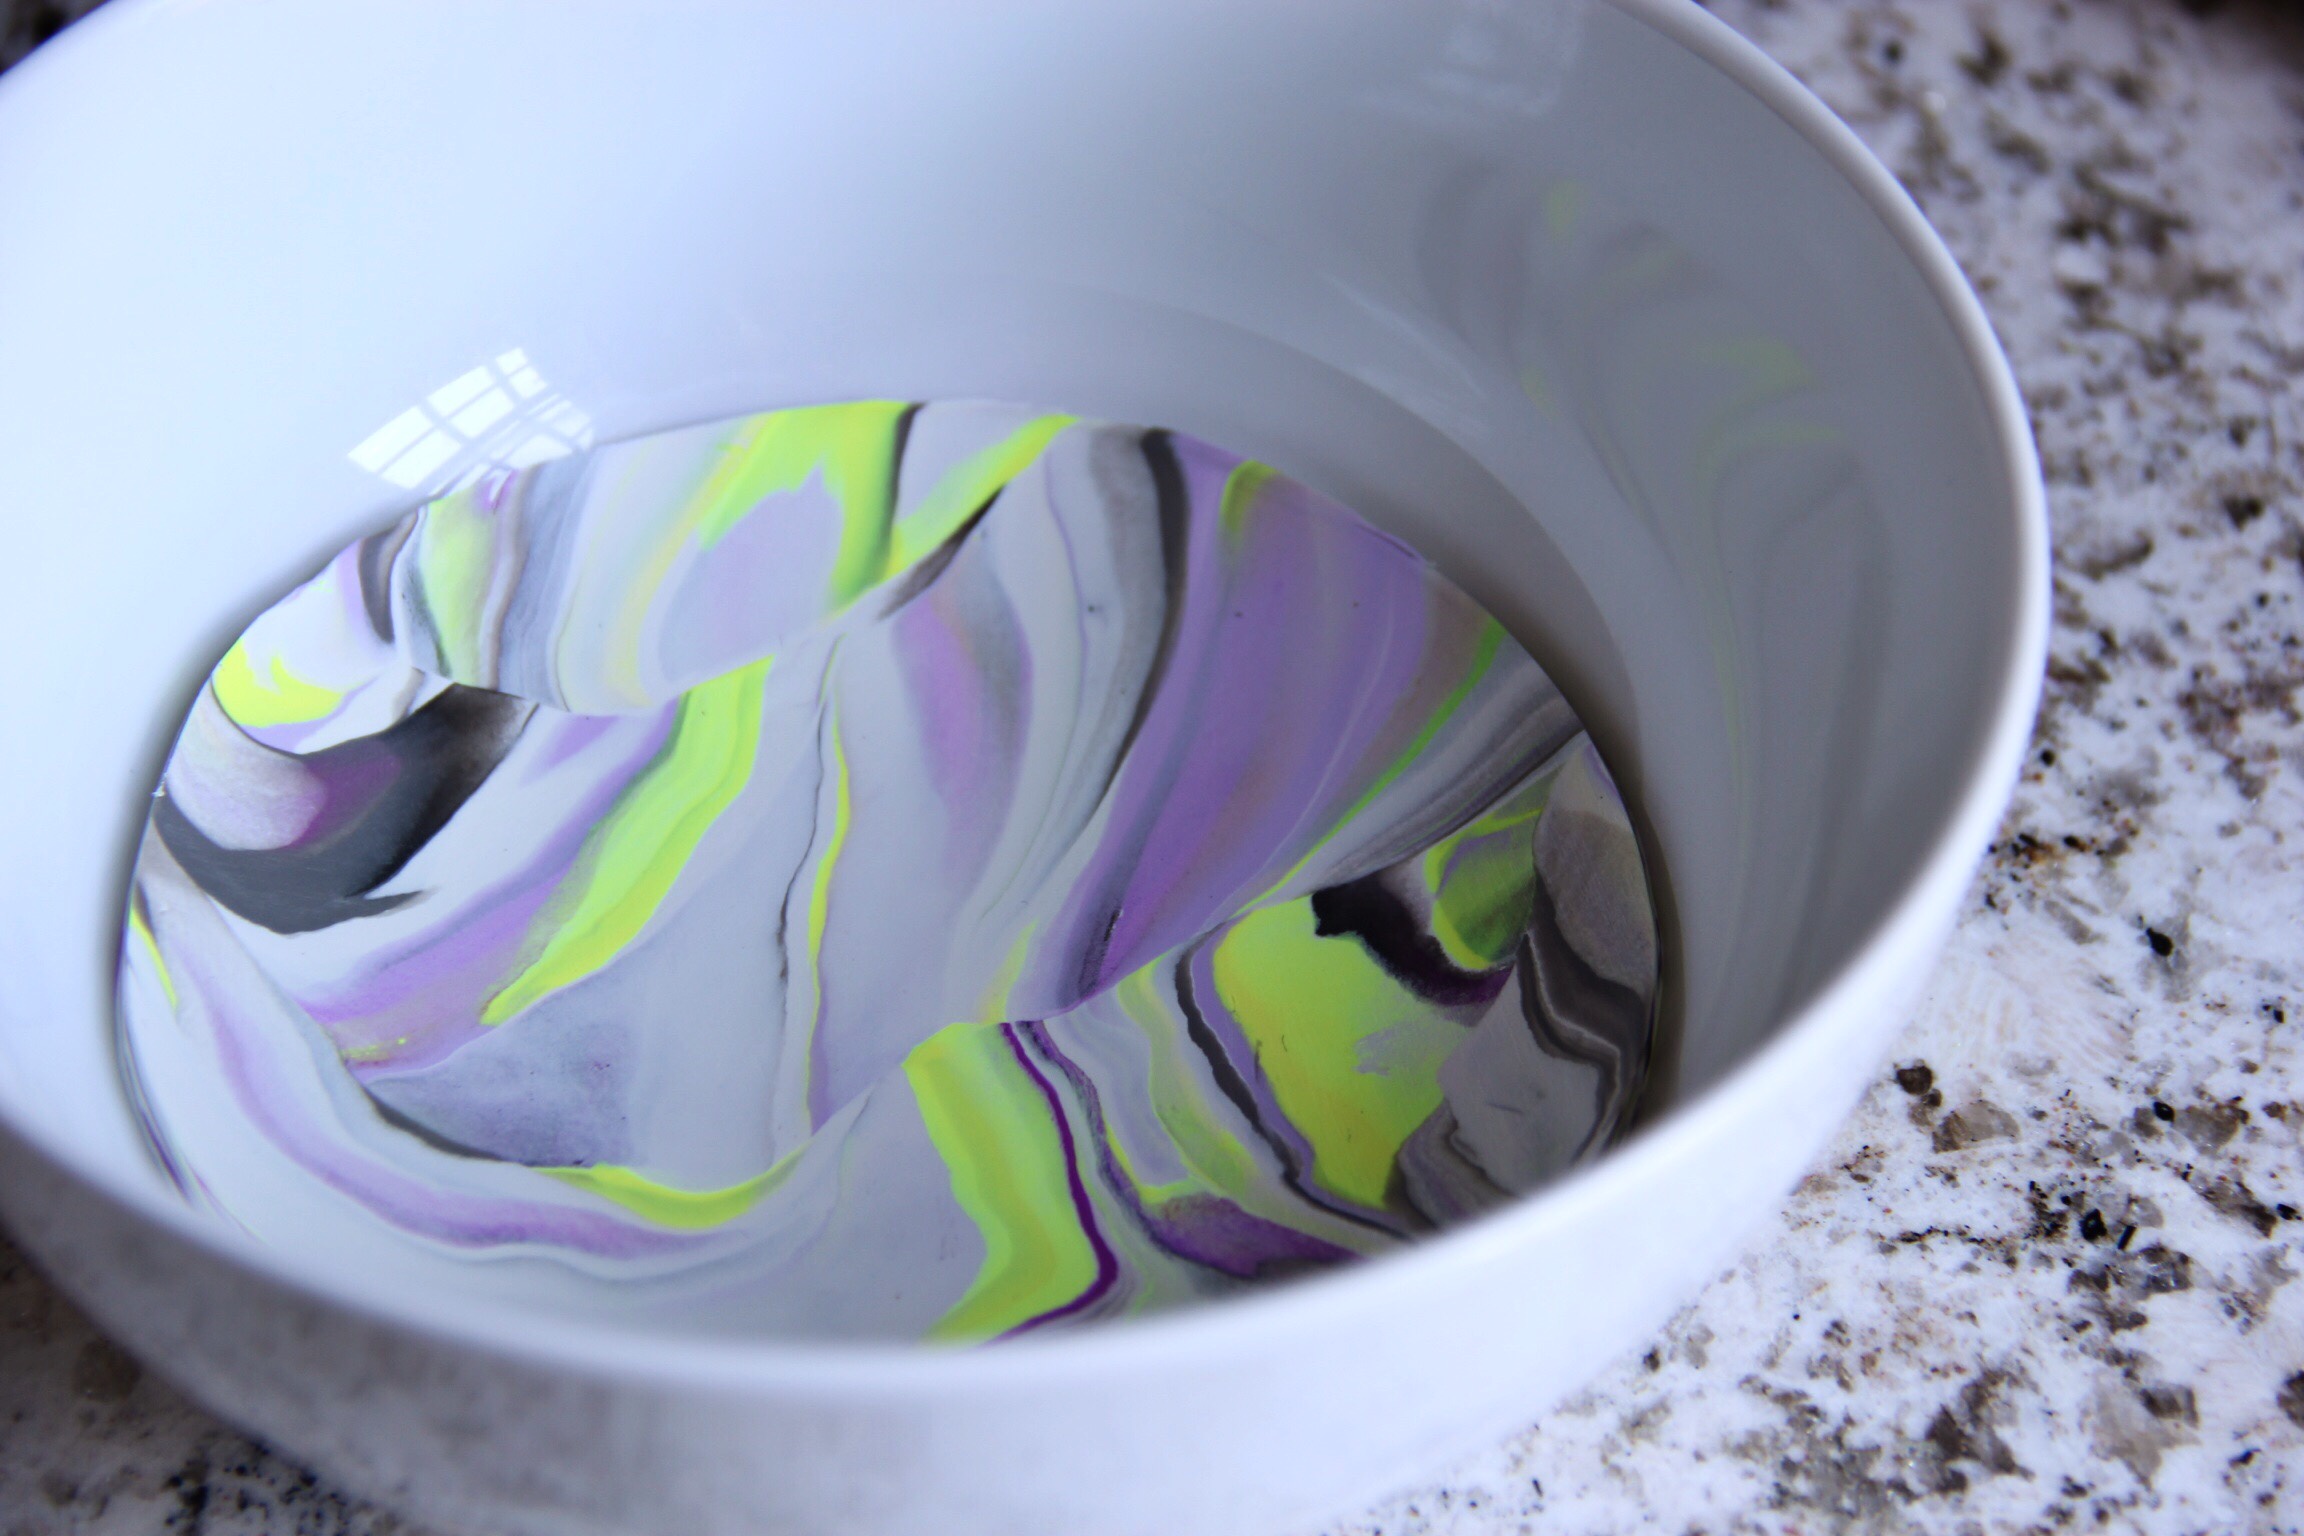
- Form snake into a ball, and roll out using a rolling pin. Roll it to whatever thickness you want, really, but I found that you could go pretty thin—aim for about 1/8 inch. Carefully peel the clay off the surface occasionally so that it doesn't stick. Roll out to a circle (doesn't have to be perfect—you can see that mine wasn't circular at all) large enough to fit whatever you're using as your stencil, and again carefully peel it off the surface to make sure it doesn't stick.
- Set stencil on top of the clay, and carefully cut around the stencil. Peel away the extra clay. (the extra is now waste—unless you can think of another use for it).
- Carefully pick up your cut out circle, and set inside the baking vessel, softening the edges if you want if they've gotten a little bent out of shape in the process (mine weren't perfect, and I ended up really liking the slightly rough edges once the gold leaf was added)
- Repeat the whole process with more clay if you'd like to try other color combinations or make more of the same (note: even if you do the same colors again, the dishes will not come out exactly the same—there's a lot of variety due to the hand-done process, which I think is the cool part!) Or, throw this one in the oven if you want to finish it before starting another.
- Bake according to the instructions on your clay's packaging.
- When finished, remove from oven and let the dishes cool completely inside their vessels. When cooled, flip vessel over into your hand, and lightly tap until the dish falls out into your hand. If it doesn't fall out, use a knife to carefully cut around the dish—you won't really need to cut—it just needs a little loosening.
- Using gold leaf, carefully paint the outside lip of each dish, and let dry for at least 15 minutes before stacking or using.
I love how these turned out, especially with the streaks of neon yellow running through. I can't wait to give them as gifts to friends (some of whom have already put claims on certain ones)!
How pretty are the gold leaf edges against the gold jewelry?
I'd love to know what color combinations you try out and like best!