Pom pom gift wrap
Jon’s sweetest nephew just had his 2nd birthday party. And let’s be real—wrapping paper, cards, and even to some extent the gifts, tend to feel more like they’re for the adults involved than the tiny human celebrating his birthday, a little unsure of all the hustle and bustle going on around him. I wanted him to really love our gift, even while still wrapped. After having taken note of a similar kind of pom pom gift wrap I'd seen, I knew it’d be a cinch to make and that it’d be perfect for Smith because of the sensory aspect of the fuzzy little pom poms. And I was right! He loved touching them and trying to pull them off. And I loved how cute the gifts turned out. I certainly plan on employing this technique again, maybe for Christmas with holiday colors, or using brown paper and plain white pom poms for a more subdued look.
Here’s what you need
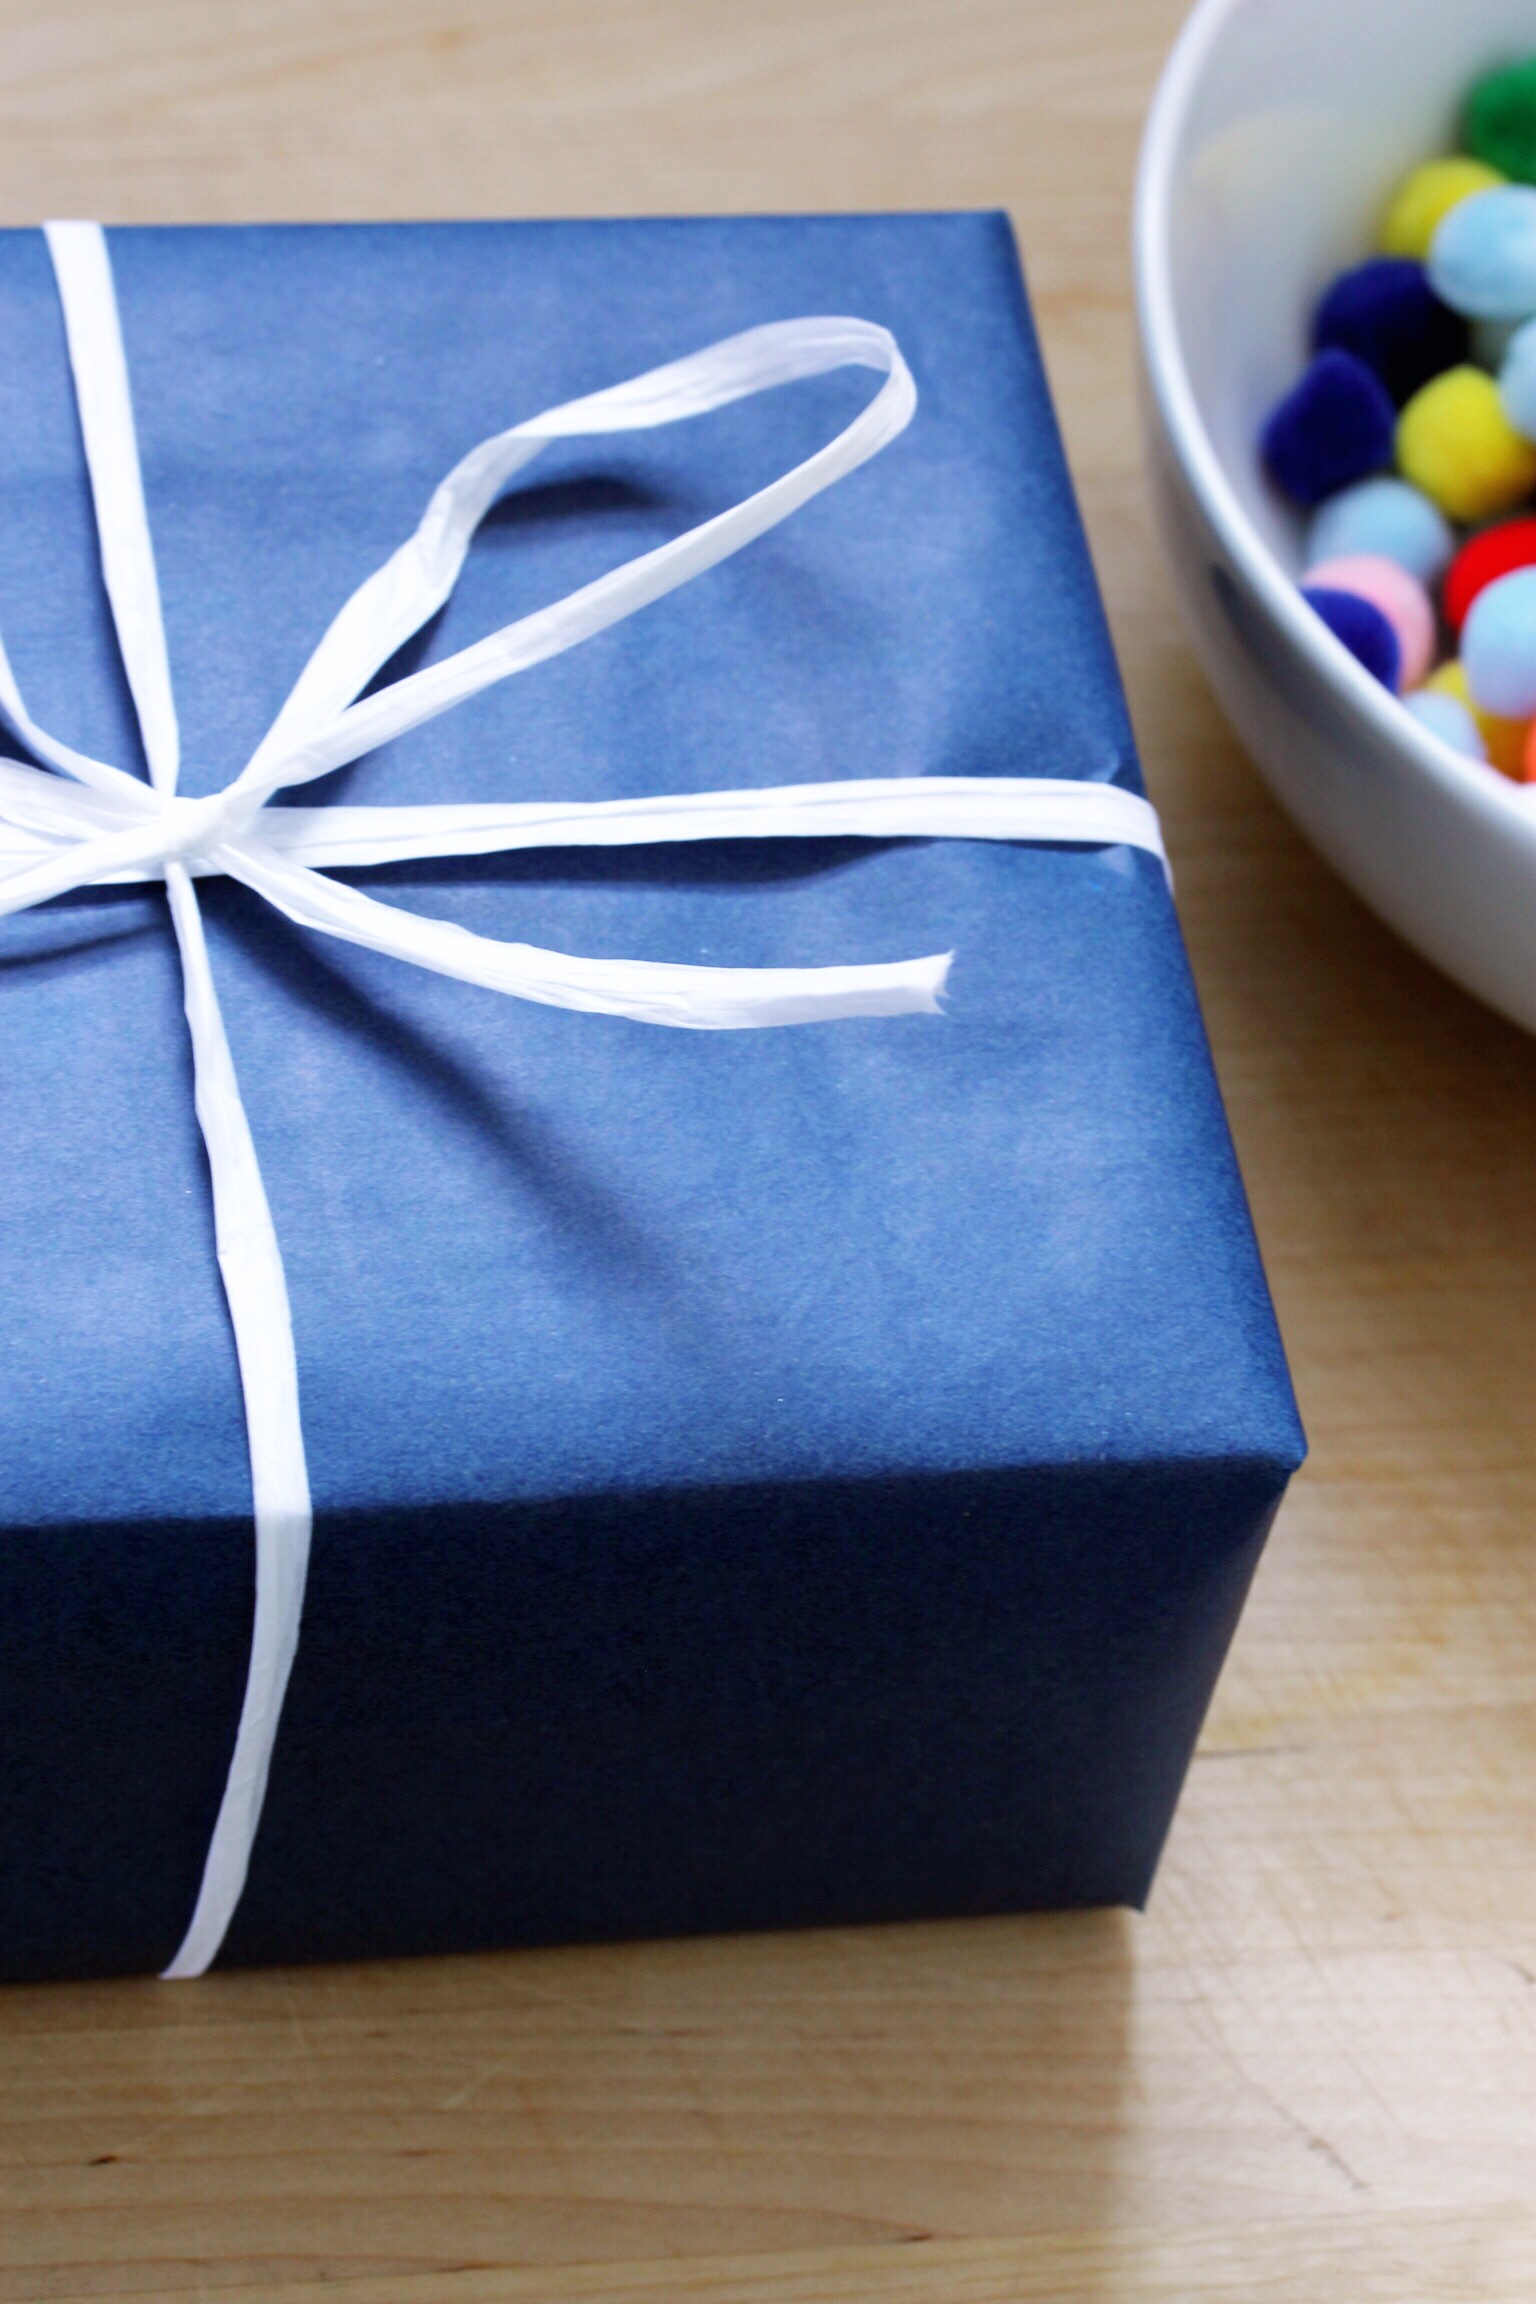
Wrapped gifts—I used this solid craft paper
Ribbon
Scissors
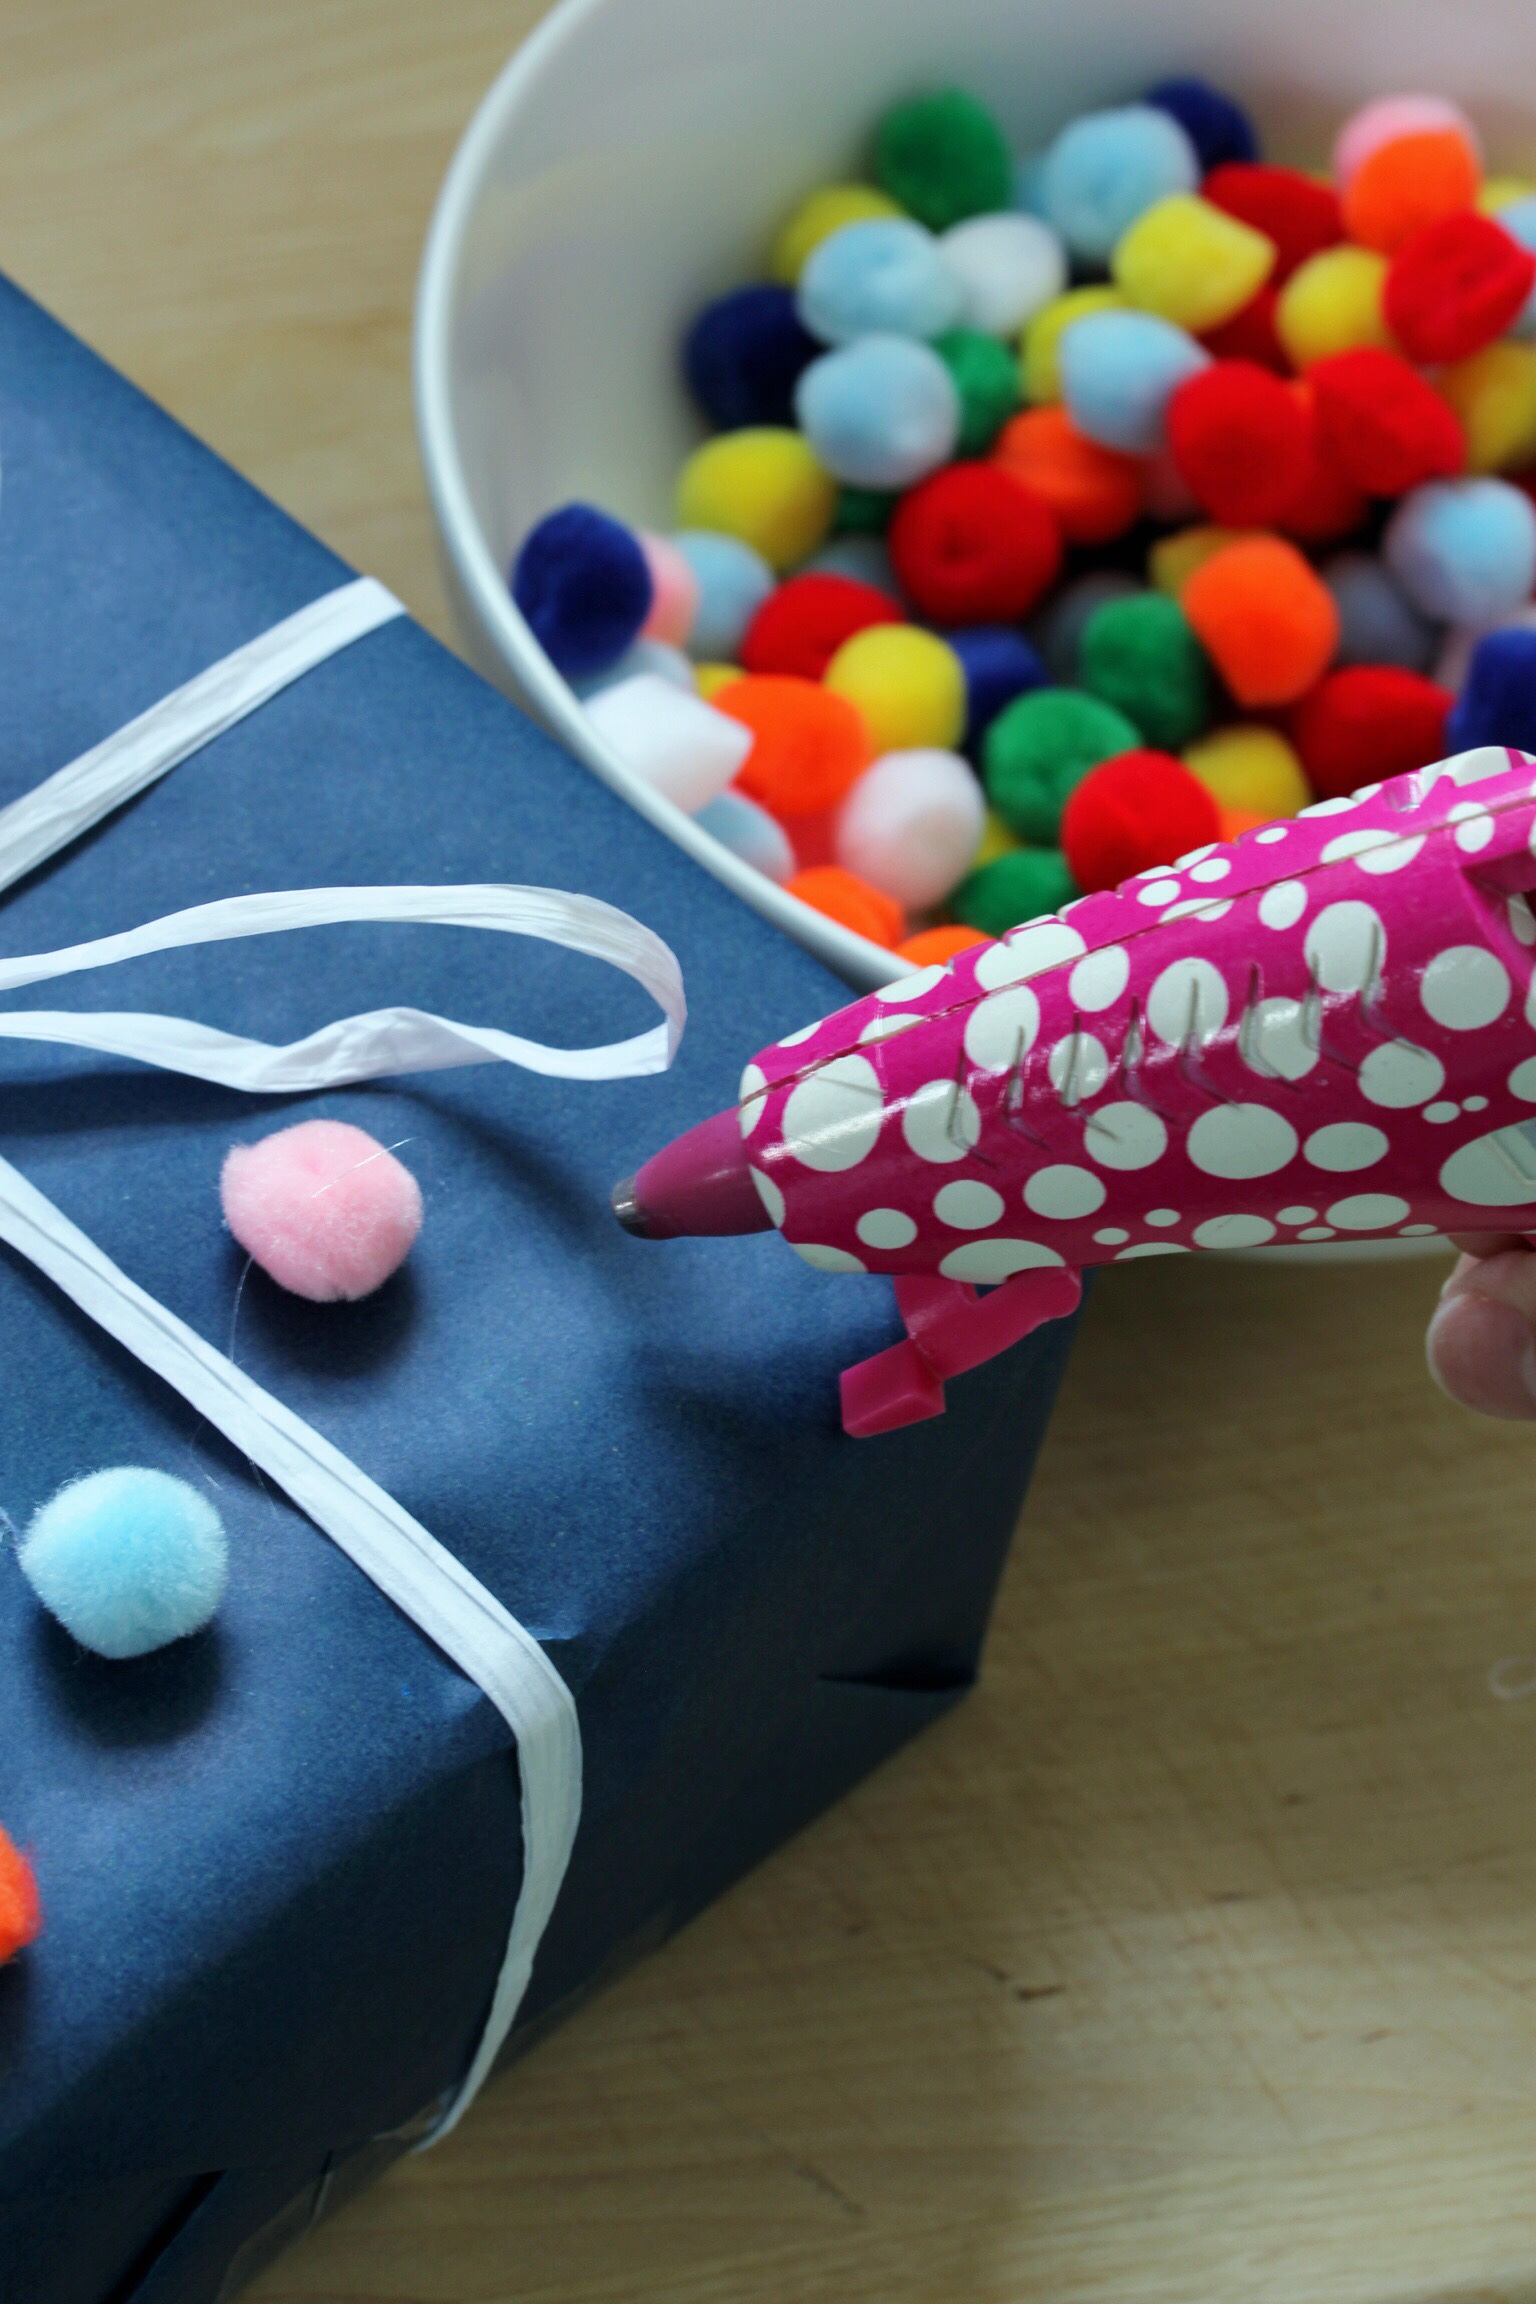
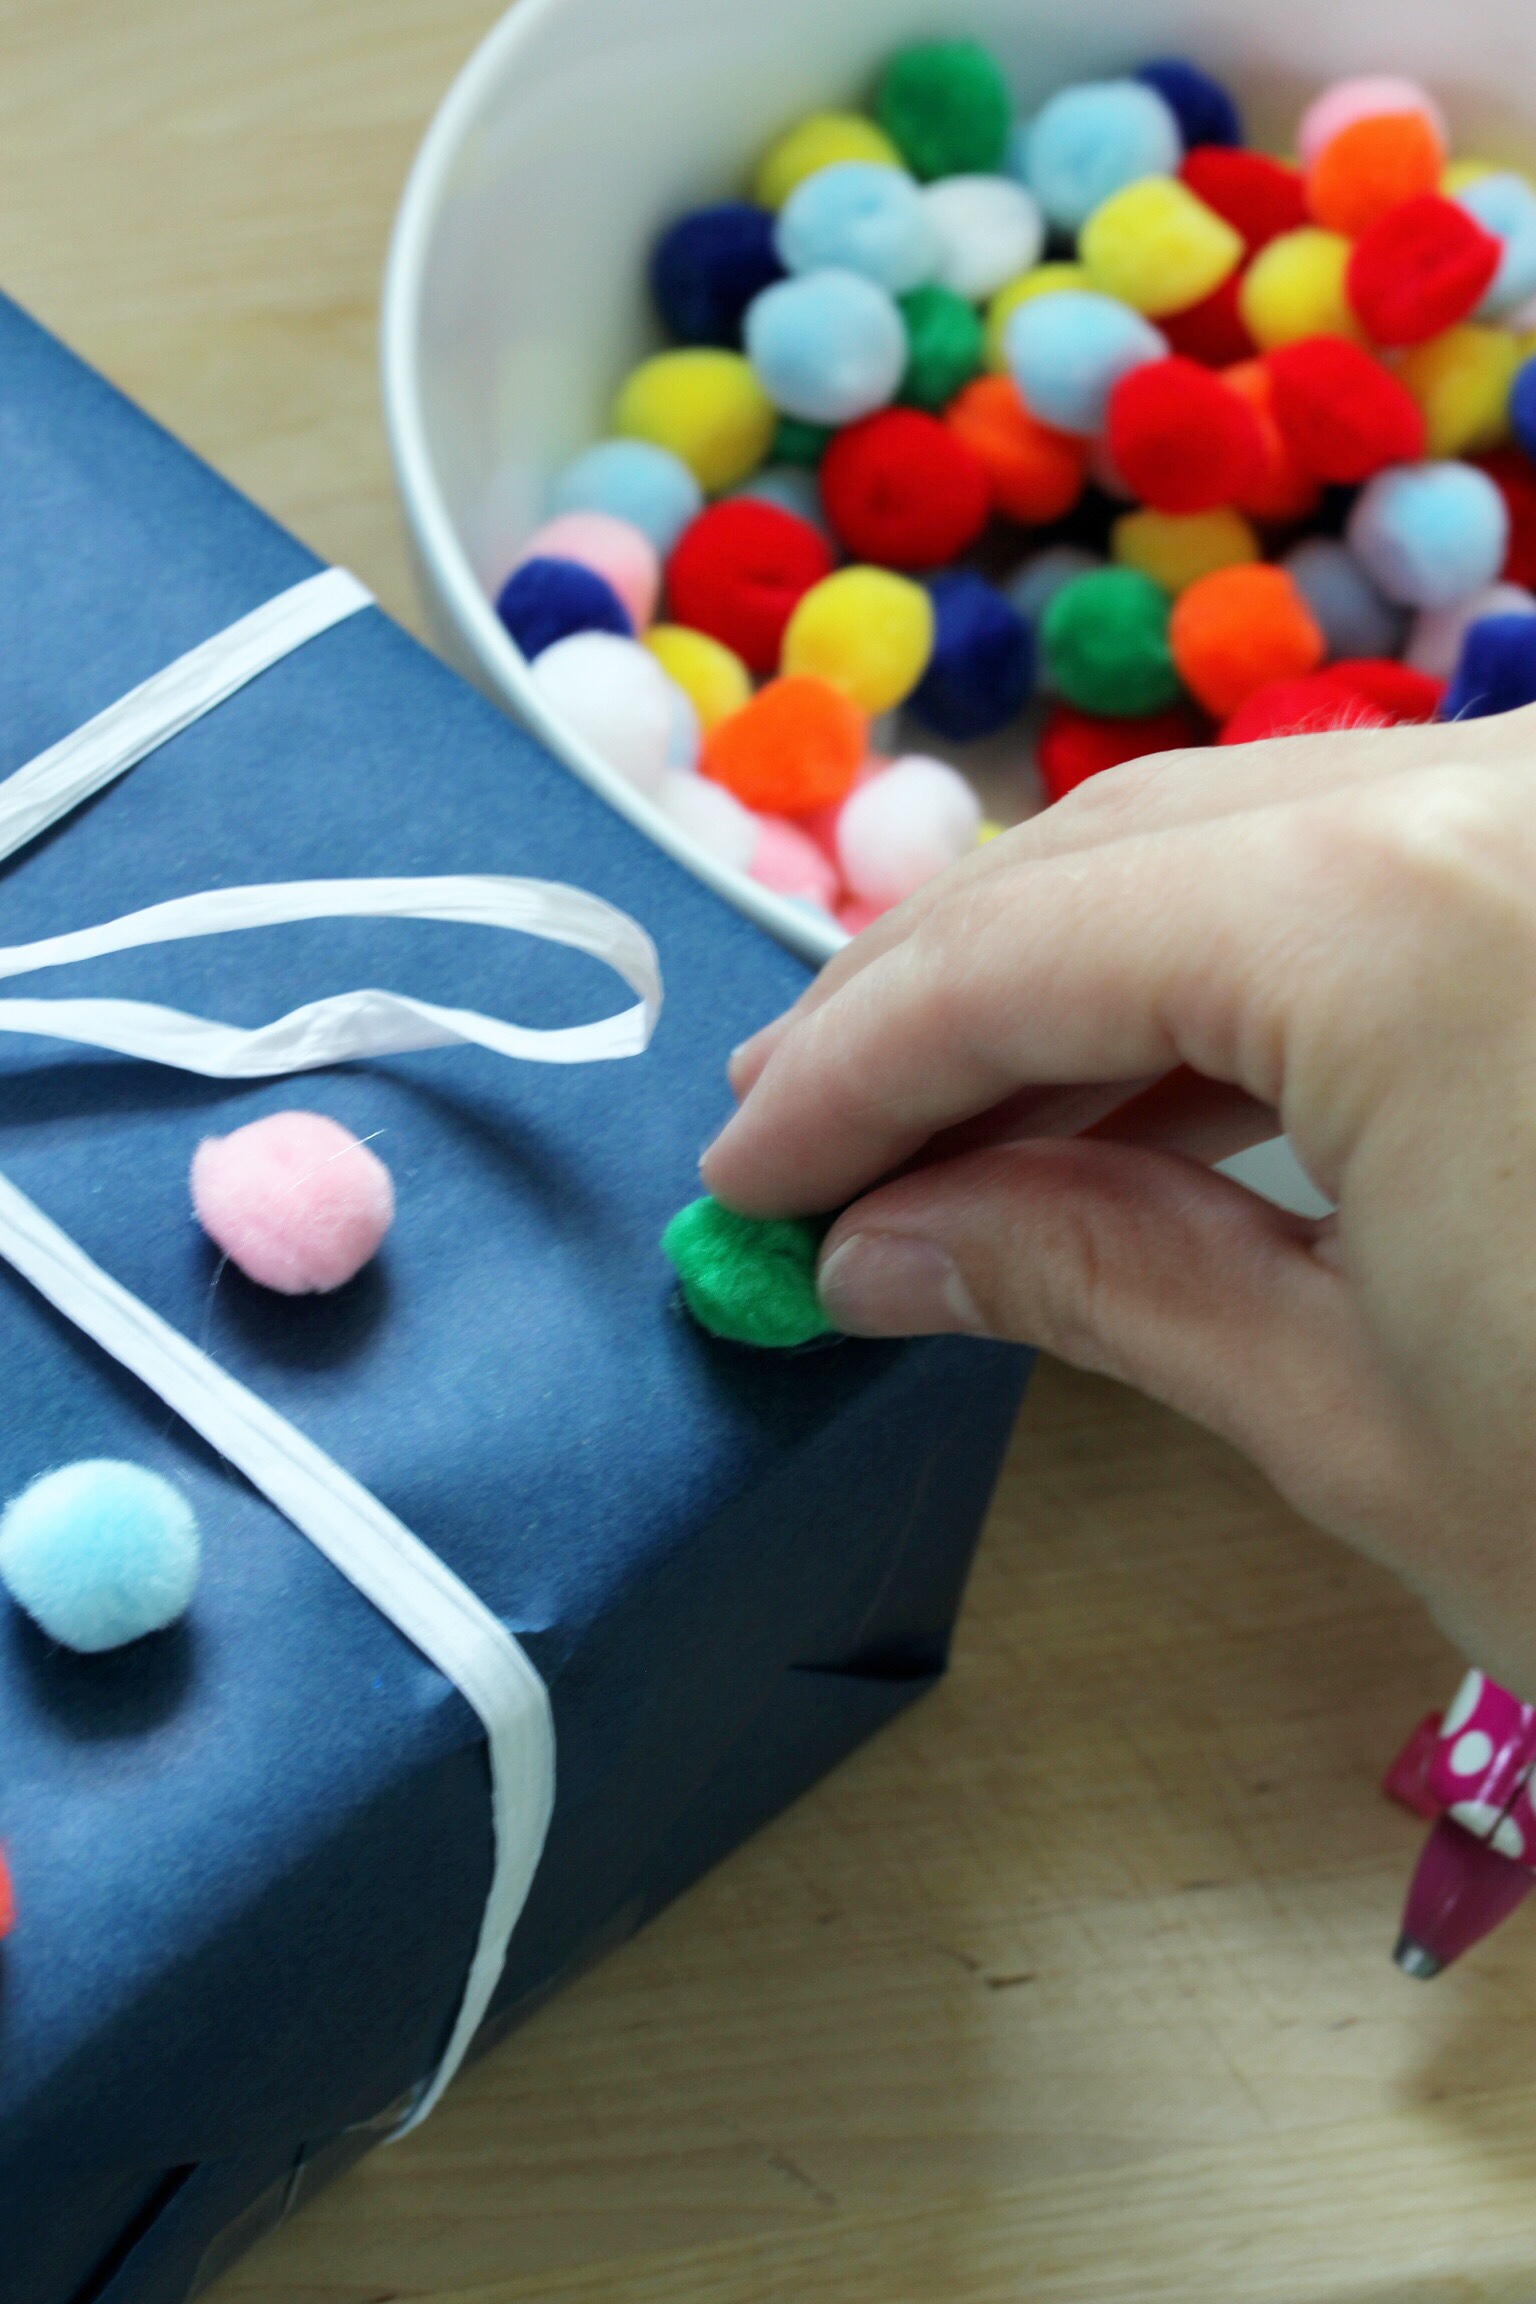
Hot glue gun (one of my favorite tools ever)
Pom poms (I got the half inch size but they come in a whole range of sizes)
Here's how you do it
Start by plugging in your hot glue gun and letting it warm up in a safe place—standing upright on its fold out stand.
Tie your ribbon onto the gift first before you begin adhering pom poms. I just tied a simple thin white bow because I wanted the pom poms to be the focus and I didn’t want it to veer towards tacky (it can happen very fast with colorful fuzzy pom poms).
Then start adhering pom poms by squeezing a tiny amount of hot glue with one hand and holding a pom pom in the other hand to be able to quickly place it on the glue and press down to adhere (the glue dries very fast). Don’t worry about any strings of glue in the air—just pull it away with you fingers as you work—it detaches easily. It’s just something to get used to when using a hot glue gun.
I worked in sections, naturally marked off by the ribbon, being mindful of spacing colors apart but still placing them pretty randomly to not look too perfect. I started on the top surface of the gift, then did each side (I left the bottom blank so that it would still sit flat).
Repeat with any remaining gifts, and you're all done! So easy and so cute!